
Learning to Love the Red Velvet Cupcake
The red velvet cake is one of those iconic food items in American culinary culture. Popular, instantly recognizable, and yet its history is shrouded in much mystery. After reading several resources on said cake, there was really no one definitive answer as to how it came about. Regardless of how the red velvet came to existence, the combination of red food colouring, cocoa and buttermilk was certainly a winning combination, and red velvet remains to be a very popular flavour in North America.
Despite its popularity, I must confess that before yesterday, I was a Red Velvet virgin. Yes, I've never had a red velvet cake or cupcake of any sort. While it is the red colouring that makes this cake so distinct, perhaps it was that fact that always turned me off of it. It was like there was a tiny little voice inside of me telling that something was wrong with it that they had to mask it with so much food colouring to win the eyes over rather than the tastebuds.
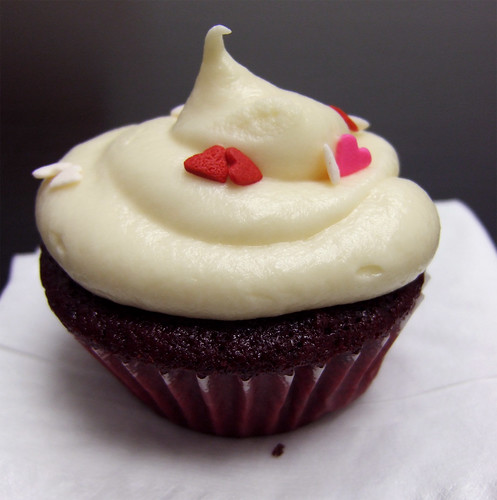
Okay, so I was wrong. I cerctainly was still skeptically as I was putting the cupcakes together. Despite how freakishly bright red the batter appear to me though, it mellows out to this gorgeous deep, burgundy red with a hint of purple from the cocoa in the batter. Taste-wise? It's kind of like a mellower cousin of the Devil's Food Cake.

The recipe I used is adapted from The Hummingbird Bakery Cookbook, the famous London-based bakery that serves up American sweets and treats. They are particularly known for their cupcakes, so I had to give these ones a whirl.
Cream cheese frosting is one of my favourites, and the perfect (and most popular) pairing for red velvet. Just don't be like me and check ahead of time to make sure you have enough icing sugar around the house, otherwise you risk making an emergency run to the grocery store at nine in the evening!
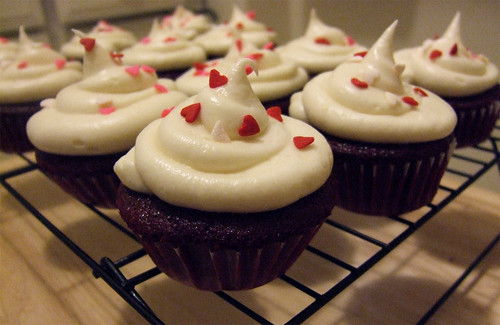
Red Velvet Cupcakes
Adapted from The Hummingbird Bakery Cookbook
Makes 12 cupcakes
1/4 cup unsalted butter, at room temperature
2/3 cup sugar
1 egg
2 tablespoon good-quality cocoa powder
2 tablespoons red food colouring *
1/2 teaspoon pure vanilla extract
1/2 cup buttermilk
1 cup plus 2 tablespoons all-purpose flour
1/2 teaspoon salt
1/2 teaspoon baking soda
1 1/2 teaspoons distilled white vinegar
Cream Cheese Frosting:
1/2 cup unsalted butter, at room temperature
6 ounces cream cheese, at room temperature
2 cups icing sugar, sifted
1/2 teaspoon pure vanilla extract
Preheat the oven to 325°F.
Put the butter and the sugar in a freestanding electric mixer with a paddle attachment (or use a handhelf electric mixer) and beat on medium speed until light and fluffy and well mixed. Turn the mixer up to high speed, slowly add the egg, and beat until everything is well incorporated.
In a separate bowl, mix together the cocoa, red food colouring, and vnilla to make a thick, dark paste. Scrape the paste into the butter mixture and mix thoroughly until evenly combined and coloured (scrape any unmixed ingredients from the side of the bowl with a rubber spatula).
Turn the mixer down to slow speed and slowly pour in half the buttermilk. Beat until well mixed, then add half the flour and beat until everything is well incorporated. Repeat this process and add the remaining buttermilk and flour. Scrape down the side of the bowl again. Turn the mixer up to high speed and beat until you have a smooth, even batter, about 1 to 2 minutes. Turn the mixer down to low speed and add the salt, baking soda, and vinegar. Beat until well mixed, then turn up the speed again and beat for 1 to 2 more minutes.
Spoon the batter into the paper cases until two-thirds full and bake in the preheated oven for 20 to 25 minutes, or until the cake bounces back when touched. A skewer inserted in the centre should come out clean. Let the cupcakes cool in the pan for about 10 minutes before turning out onto a wire rack to cool completely.
To make the cream cheese frosting: With an electric mixer on medium-high speed, beat butter and cream cheese until fluffy, 2 to 3 minutes. Reduce speed to low. Add sugar, 1/2 cup at a time, and then vanilla, and mix until smooth and combined, scraping down sides of bowl as needed. Spread or pipe the icing onto the cool cupcakes.
* I used a half/half mix of the cheap, liquid food colouring you often find at supermarkets, and the gel food colouring, which is super thick and super concentrated can be often be found in specialty cooking hardware/supply stores, craft stores or in the baking aisle of bulk food stores. The addition of the gel food colouring ensures that you'll get a much deeper colour in your cupcake.


4 comments:
Mmmm, red velvet is my family's favorite cake. Your cupcakes look so prettily decorated and, of course, that cream cheese frosting is a must. I have a sweet treat linky party going on at my blog called "Sweets for a Saturday" and I'd like to invite you to stop by this weekend and link your cupcakes up. http://sweet-as-sugar-cookies.blogspot.com/2011/02/sweets-for-saturday-4.html
I made these cupcakes on Sunday (for Valentine's Day today) and they came out perfectly! They are so yummy. I think the buttermilk adds a little something special. Thanks for the recipe and great step-by-step, B!
These are gorgeous, B! I've somehow never made red velvet cupcakes either, even though I adore them. I'll be trying this recipe soon!
Thanks for the invite Lisa! Sorry to have missed it but I was out of town that weekend!
Glad you enjoyed them Kendra! And yes, you should make them Suz! :)
Post a Comment