
Seven-Yolk Pasta

Rich, creamy and yellow. Egg yolks are a beautiful thing, but sometimes when I’m left with extra yolks, I don’t know what to do with them. I find myself in that dilemma a while back ago and yet I didn’t feel like making custard or curd of any sort.
Ben, a Twitter friend, suggested I make this seven-yolk pasta, and since I hadn’t made homemade pasta in ages, this recipe totally piqued my interest.
I tweaked the recipe a bit by replacing some of the all-purpose flour with semolina flour to create a better texture and colour in the pasta.
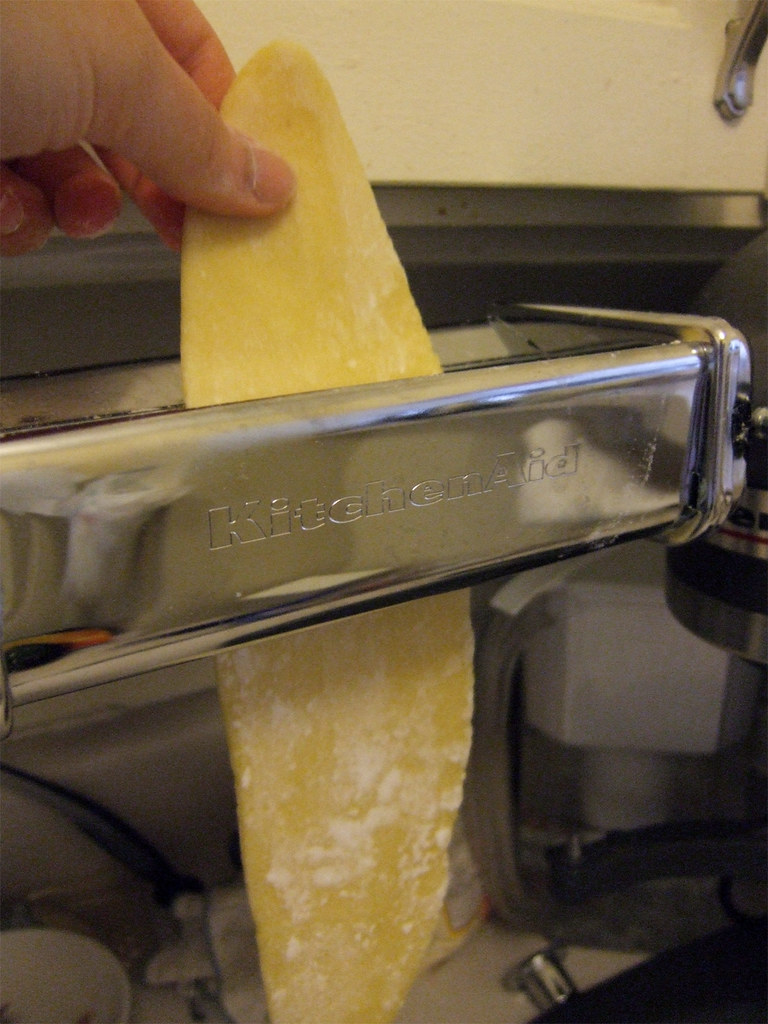
If you’ve never made pasta at home, it’s not as intimidating as it seems. Once you have a pasta-maker, whether it’s the hand-crank version or a mixer attachment, you’re good to go. Be patient with the dough though. Kneading the dough is crucial is ensuring you get perfect pasta.
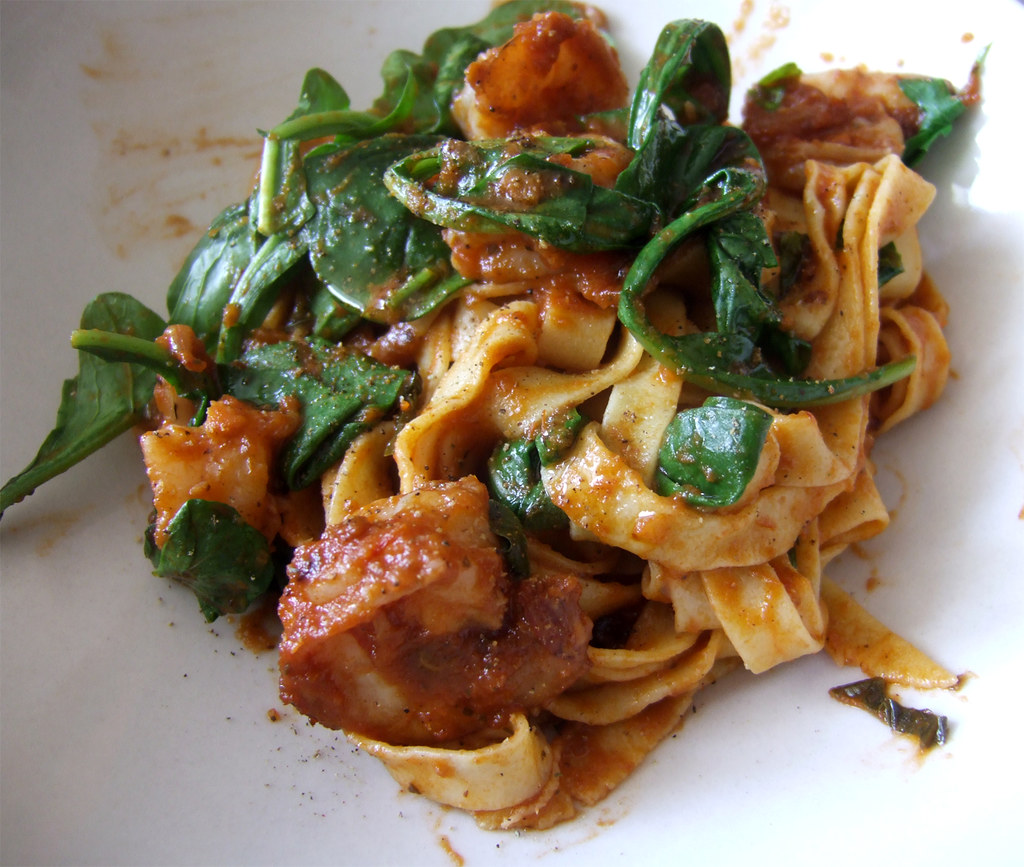
Pasta should be air-dried for at least 10 minutes. You can use hangers to you’re your pasta from, or twirl them into a bunch, making sure you flour the pasta generous beforehand to ensure the strands don’t stick together. Fresh pasta takes much less time to cook, about 3 to 4 minutes. Toss with your favourite sauce and enjoy!
Seven-Yolk Pasta Dough
Adapted from Smitten Kitchen
1 all-purpose flour
3/4 cup semolina flour
1/2 teaspoon salt
6 large egg yolks
1 large egg
1 1/2 teaspoons olive oil
1 to 2 tablespoons water
Mound flour, semolina and salt on a board or other surface and create a well in the center, pushing the flour to all sides to make a ring with sides about 1-inch wide. Make sure that the well is wide enough to hold all the eggs without spilling.
Pour the egg yolks, egg, oil and milk into the well. Use your fingers to break the eggs up. Still using your fingers, begin turning the eggs in a circular motion, keeping them within the well and not allowing them to spill over the sides. This circular motion allows the eggs to gradually pull in flour from the sides of the well; it is important that the flour not be incorporated too rapidly, or dough will be lumpy. Keep moving the eggs while slowly incorporating the flour. Using a pastry scraper, occasionally push the flour toward the eggs; the flour should be moved only enough to maintain the gradual incorporation of the flour, and the eggs should continue to be contained within the well. The mixture will thicken and eventually get too tight to keep turning with your fingers.
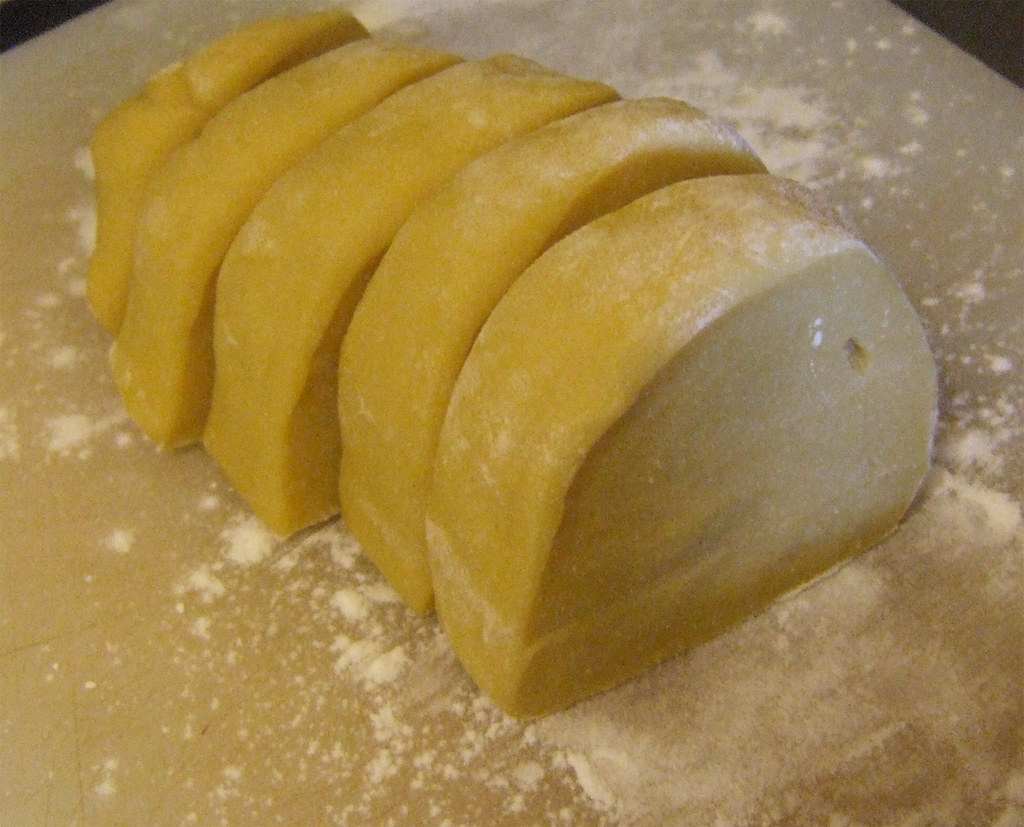
When the dough begins thickening and starts lifting itself from the board, begin incorporating the remaining flour with the pastry scraper by lifting the flour up and over the dough that’s beginning to form and cutting it into the dough. When the remaining flour from the sides of the well has been cut into the dough, the dough will still look shaggy. Bring the dough together with the palms of your hands and form it into a ball. It will look flaky but will hold together.
Knead the dough by pressing it, bit by bit, in a forward motion with the heels of your hands rather than folding it over on itself as you would with a bread dough. Re-form the dough into a ball and repeat the process several times. The dough should feel moist but not sticky. Let the dough rest for a few minutes while you clean the work surface.
Dust the clean work surface with a little flour. Knead the dough by pushing against it in a forward motion with the heels of your hands. Form the dough into a ball again and knead it again. Keep kneading in this forward motion until the dough becomes silky smooth. The dough is ready when you can pull your finger through it and the dough wants to snap back into place. The kneading process can take from 10 to 15 minutes.
Even if you think you are finished kneading, knead it for an extra 10 minutes; you cannot overknead this dough. It is important to work the dough long enough to pass the pull test; otherwise, when it rests, it will collapse.
Double-wrap the dough in plastic wrap to ensure that it does not dry out. Let the dough rest for at least 30 minutes and up to 1 hour before rolling it through a pasta machine. The dough can be made a day ahead, wrapped and refrigerated; bring to room temperature before proceeding.


4 comments:
Looks delicious Bonita! Still looks intimidating to me...I may try to make my own pasta in a couple of years lol =)
Oh my goodness gracious - how decadently delicious!!! And I think you used the eggs from Stratford, right? Your pasta is absolutely gorgeous - love the colour from the semolina!
Extra yolks? Buy an ice cream maker :)
Definitely going to try this....looks delicious!!
Post a Comment