Wednesday, April 17, 2013
Wednesday, October 19, 2011
Wordless Wednesday #60: Hot Balls
Posted by Bonita at 9:00 a.m. 0 comments
Labels: arancini, dining out, hot balls, italian, photography, restaurant, risotto, table 17, toronto, wordless wednesday
Friday, October 14, 2011
My New Favourite Brunch Dish: Polenta with Sausage Sugo
Tuesday, January 11, 2011
How to Utterly Tire Yourself Out with Just One Meal: The New Year's Eve Dinner
Wednesday, October 13, 2010
Wordless Wednesday #18: Una pausa caffè
Posted by Bonita at 11:00 a.m. 0 comments
Labels: baking, biscotti, cookies, cornmeal, fig, italian, olive oil, photography, walnut, wordless wednesday
Friday, June 18, 2010
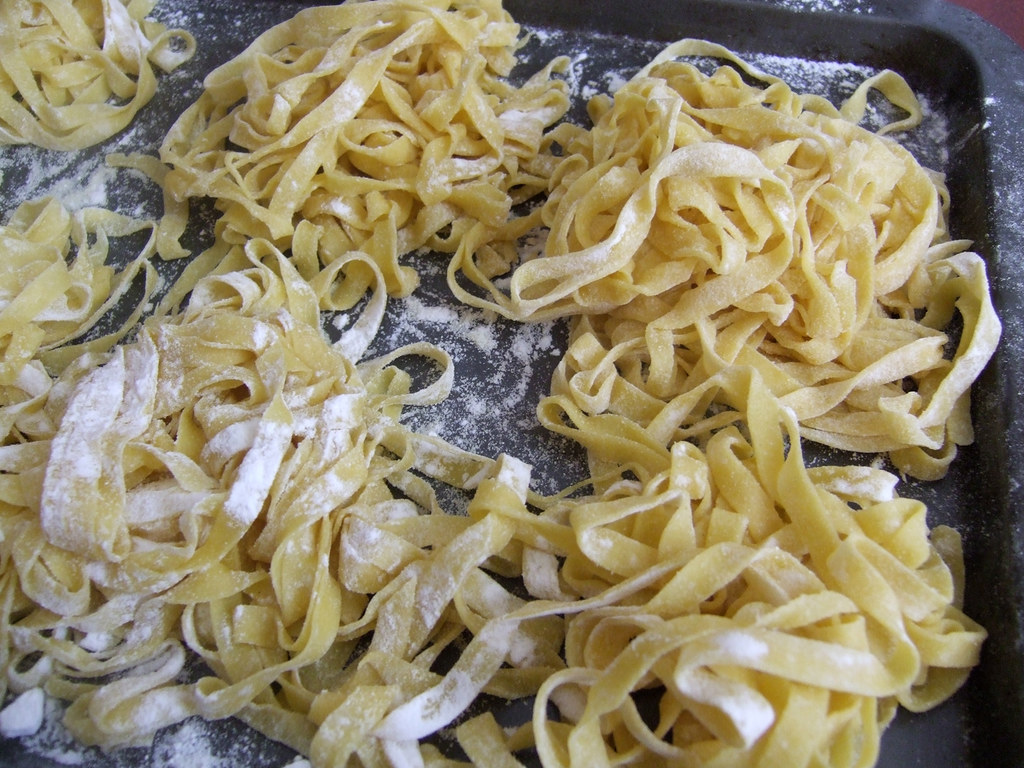
Seven-Yolk Pasta
Saturday, March 6, 2010
Not-So-Humble Beans

Beans are such a beautiful thing. Especially when you cook them from scratch. Forget the canned stuff that’s packed with sodium and whatever else that’s in there to help make them last longer on the shelf. Yes, it requires time, which, in our day and age, is so precious and few are willing to relinquish it. But here’s why you should cook beans from scratch:
Posted by Bonita at 4:20 p.m. 3 comments
Labels: comfort, dinner, healthy, italian, recipe, vegetarian
Saturday, December 19, 2009
Christmas Cookie Round-Up 2009 – Part 1: Cranberry Pistachio Biscotti

I posted this recipe a long time ago in my previous blog that I shared with my brother, but thought that these biscotti were deserving of a repost here on Bon Eats.
I’ve made quite a few biscotti in my days (not at all an influence from all those Italian classes I took in university!) but these have to remain one of my top favourites. The tart-sweetness of the cranberries plays off the buttery crunchiness of the pistachios. And I love the use of olive oil in this recipe—you can subtly pick it up in the cookie.
Tuesday, September 22, 2009
The Tomato Marathon
"Double, double toil and trouble,
Fire burn, and cauldron bubble."
-- William Shakespeare, Macbeth (IV.i.10-1)
So I did roast a double batch of tomatoes. The cauldron (er...the dutch oven) did bubble just a little. And if you imagine my electric oven to be the fire, then yeah, it was burning pretty much all day. But this tomato sauce is anything but toil and trouble, and thank goodness for that!
I went to St. Jacobs' Farmers' Market last week (just outside of Waterloo). I used to love going to that market--it is always bustling with people, there is loads of beautiful fresh produce available for a cheap price, and the fact that it's out in the open and practically out in the countryside makes the atmosphere that much more charming. But ever since my brother graduated from university and left Waterloo for bigger and better things, I haven't had the chance to go back until now. It's still as I remembered it, and still just as bustling, even on a weekday.
I used to always watch others haul around large sacks of tomatoes and peppers from the market. St. Jacobs' likes to sell things by the bushel, any home canners' and preservers' dream. So I thought, "What the heck, why don't I buy a bushel of tomatoes myself? Make some tomato sauce. In my teeny, tiny closet of a kitchen..."
I found this wonderful Slow-Roasted Tomato Sauce recipe over at Cuizoo, and I knew they were just calling out to my own plum tomatoes. Best of all, it required minimal work: no blanching, no peeling, and no seeding! Three steps saved--and those steps are usually the most painful process of making tomato sauce. By slow roasting them, you also allow the sugar in the tomatoes to caramelize, creating a richer, sweeter flavour. It may seem like a long time in the oven, but trust me, all you have to do is cut up the tomatoes and other vegetables, stick it in the oven, and sit back and relax while the tomatoes do their magic. Tomato sauce has never been this easy.
The smell that is created from the tomatoes, onions, garlic, oregano and balsamic is absolutely divine! And when they come out of the oven, they are so soft and ready to be pureed into some fabulous sauce. Once pureed and back in the pot, add a good slug of red wine and any other herbs and additions you'd like (ground meat, meatballs, red chilli flakes, mushrooms, etc.). It's a little sweeter than your usual tomato sauce you'd find in a can or a jar, but the flavours will blow you out of this world. If you prefer your sauce on the acidic side though, perk it up with a little lemon juice, red wine vinegar or balsamic vinegar. Enjoy immediately with some pasta, and can or freeze the rest for later in the winter!
With the abundance of tomatoes I brought home, I still had lots leftover to make some soup. I apparently didn't get enough roasting action yesterday so I roasted some more today to make a Roasted Tomato Soup, served alongside a grilled cheese and tomato sandwich. A classic combination, and perfect for welcoming the first day of autumn.
Roasted Tomato Soup
Adapted from Gourmet, March 1993
Serves 4
3 lbs plum tomatoes, quartered lenghtwise
5 to 6 cloves garlic, unpeeled
1 large shallot, finely chopped
Olive oil
Sea salt and freshly ground black pepper
1/2 tsp dried oregano, crumbled (or 1 tbsp fresh oregano)
2 sprigs fresh thyme, leaves removed from stalks
1 bay leaf
1 1/2 cups low-sodium chicken broth, plus more if needed
1 to 2 tbsp honey (optional) **
Handful fresh basil
Preheat the oven to 350°F. Spread the tomatoes, skin side down, in one layer in a roasting pan, add the garlic. Drizzle with a little olive oil and season with salt and pepper. Bake the tomatoes and garlic for 45 minutes to 1 hour, or until the tomatoes are very soft and their skin is dark brown and blistered. Let the tomatoes and garlic cool a little in the pans.
Heat some olive oil in a heavy saucepan over medium heat. Cook the shallot, oregano and thyme, stirring, until the shallot is soft. Add the tomatoes, garlic (skins discarded), bay leaf, and 1 1/2 cups of the broth. Season with salt and pepper, and simmer the mixture, covered, for 15 minutes.
Remove the bay leaf. In a blender, puree the soup in batches until very smooth. Force pureed mixture through a fine sieve set over the clean saucepan. If soup appears a little thick, thin it out with some broth. Add the honey (if needed), stir in the basil, and season again with salt and pepper if required. Serve hot sprinkled with some freshly grated parmiggiano-reggiano.
** NB: I find the honey helps cut back on the acidity of the tomatoes, giving for a much smoother taste overall. You may find that honey is unnecessary if you have extra sweet tomatoes, so be sure to taste the soup before deciding whether it is needed or not. Alternatively, you can add a dash of cream, which will also help mellow out the acidity.
Posted by Bonita at 8:00 p.m. 0 comments
Labels: comfort, dinner, italian, lunch, pasta, recipe, soup, vegetarian
Sunday, May 3, 2009
Caprese Pasta Salad
Pasta salads are so easy to throw together, which is why I made a Caprese Pasta Salad the other day for our first ever book club meeting. I can easily cook the pasta the night before, and simply add the rest of the ingredients and the dressing when I come home from work the next day!
Had some basil leftover from last week’s stir-fry and didn’t know what else to do with it at the moment, so I thought I would make a pasta salad out of it. Picked up some nice cherry tomatoes at the market, along with some baby bocconccini. Tossed the salad with a handful of parsley as well and balsamic vinaigrette. Super easy, and super light!
Great for picnics and for lunches! What’s your favourite pasta salad?
Posted by Bonita at 3:28 p.m. 0 comments
Labels: italian, lunch, pasta, salad, vegetarian
Sunday, February 22, 2009
How to Survive a Crazy Week

This is it folks! My week from hell. Every semester, there always seems to be one week where every possible assignment you can imagine is due. It’s a conspiracy theory, I tell you. Granted, it’s nothing like the hell weeks I experienced back in my undergrad days. Nothing beats pulling all-nighters and playing recall wars in a desperate attempt to churn out 2500 words...times four. How I don’t miss those days! But with two midterms, two assignments and production nights for our magazine this week, it’ll be a week for little sleep and lots of caffeine!
My solution? Make some caffeine-packed biscotti! They’re incredible delicious, portable, and makes for a double dose when you dip them in your coffee. These biscotti have the added depth of cinnamon, which goes so well with the espresso flavour, making for the cookie version of a cappuccino sprinkled with cinnamon. Add chocolate and toasted pecans to the dough and you’re in bliss!
These biscotti have a different texture from your average, hard-as-rock ones you’d find in stores and coffee shops, which isn’t necessarily a bad thing for those who, like me, don’t want to break a tooth when eating them sans-coffee. They're lighter and crispier, but just as delicious. These are a great little booster during your mid-afternoon coffee, but will also surely impress your guests the next time you have them over for coffee. Be warned: these are highly addictive!
Cinnamon Mocha Biscotti
Adapted from Recipezaar
Makes about 3 dozen
1/2 cup butter, at room temperature
1/2 cup brown sugar, firmly packed
1/2 cup white sugar
2 tbsp instant expresso or instant coffee granules
2 large eggs
1 tsp vanilla extract
2 cups all-purpose flour
2 tsp baking powder
1/2 tsp salt
1 heaping tsp ground cinnamon
1 cup toasted pecans, chopped
3/4 to 1 cup semisweet chocolate chips
Preheat the oven to 325°F.
Mix flour, baking powder, salt and ground cinnamon in a medium bowl; set aside.
Combine sugar and butter and mix until light and fluffy. Add the espresso or coffee granules; mix until combined. Add the eggs, one at a time, beating well after each addition. Add the vanilla extract and mix briefly.
Add the dry ingredients and mix until just incorporated. Fold in the pecans and chocolate chips.
Divide dough in half. Form two 12" x 2" logs on a baking sheet lined with parchment paper. Bake for 35 minutes, or until firm.
Remove from oven and cool for 10 minutes. Transfer the logs to a cutting board. Using a serrated knife, cut the logs diagonally into 3/4-inch-wide slices. Place slices, cut side down, on the baking sheet. Bake for 12 minutes. Turn biscotti over, bake about 12 minutes more or until light golden and firm. Transfer biscotti to racks and cool.
Wednesday, November 19, 2008
Bar Mercurio
Everyone has their one favourite hangout that really speaks to them. My recent fave hangout ever since I’ve moved to Toronto is Bar Mercurio, a really cute and quaint café right in the St. George campus of University of Toronto. I was first introduced to the place by my former professor, and we always meet up for coffee at this joint. Furthermore, it’s located right in the English building, so it’s definitely a restaurant made just for a literary nerd like myself.
What I love about the place is how small it is. Granted, some may think it’s cramped, with the tables pushed very close together. Noise level skyrockets when the dinner rush is in full swing. Despite all that, it still gives off a warm, cozy, intimate feel, reminiscent of those European cafés and bistros. The décor harkens back to European bars and bistros of the ‘40s and ‘50s, with a slight Old-World feel. The biggest highlight though is the open kitchen, situated at the back of the restaurant. Patrons have a full view of the two chefs at work, and the minute you walk into the door, you’re greeted with delicious smells wafting over from the kitchen.

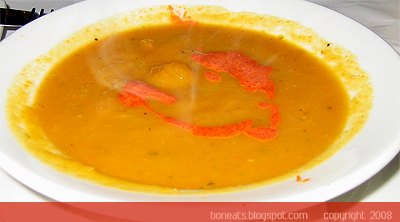
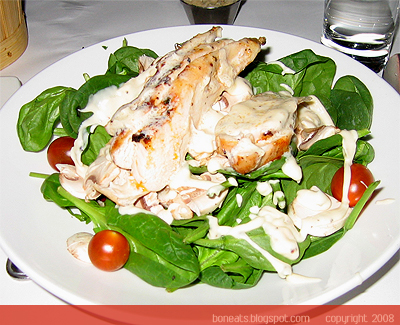
After a lovely evening spent with George, I was absolutely famished. Dinner started off a bit slow. The appetizers took forever to get to our table (perhaps I was just really hungry, but even my brother agreed that the appetizers longer than normal), and I ended up stuffing my face with foccaccia (a bad idea). The bread was a bit on the chewy side, but the accompanying tuscan bean dip was quite nice. Finally our appetizers came after much waiting and anticipating. I ordered the purée of sweet potato soup. It wasn’t completely pureed; some of the sweet potatoes were left in small pieces, along with bits of shredded chicken, adding a nice textural element to the soup. The soup was nicely balanced in flavour as well (not too sweet!) with a little kick to it from the cayenne pepper. My brother, meanwhile, ordered the baby spinach salad with seared chicken breast, red grapes, mushrooms and gorgonzola dressing.

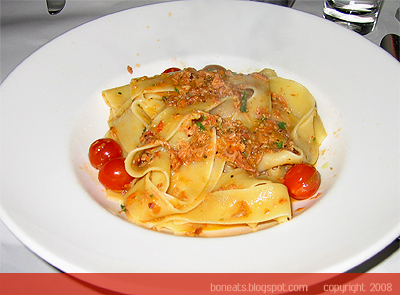
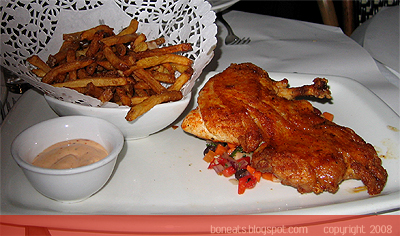
Not long afterwards, our main courses arrived. Despite my suggestions for him to try Mercurio’s ginormous pizza, he opted for the pappardelle with duck ragu, while I ended up with the roasted crispy & honey-glazed capon breast, served on top of a mixed bean and vegetable salad, and house fries with a smoky chipotle aioli. The capon was beautifully cooked; juicy and tender on the inside, with an incredibly crispy skin. The honey glaze adds just enough sweetness to the dish to get the taste buds excited.
I was a little disappointed with the service last night though. Usually the wait-staff (and you do get to know them over time) is pretty attentive. I can’t put all the blame on them for the slow service; the kitchen was slow in dishing out our appetizers. And perhaps because we were tucked away in the corner, we were out of their radar. But on the whole, the food was delicious, the waiters are really friendly, and you just can’t beat the atmosphere in the restaurant. If you go, be sure to make reservations. The restaurant gets packed on most nights, and it’s impossible to get a table on the weekends without one (unless you want to dine at the bar). Lastly, please do try their amaretto cheesecake. It is a slice of heaven. I always order it whenever I come to Mercurio, along with a cup of americano (one of the best coffee you’ll find in town). I ended up taking my piece of cake home with me last night so that I can have a little midnight indulgence.
Name: Bar Mercurio
Address: 270 Bloor St. W.
Cuisine: Italian
Price Rating: Entrees $15-26
Accessible: No
Posted by Bonita at 9:35 p.m. 0 comments
Labels: dining out, dinner, italian, toronto
Wednesday, November 12, 2008
Pizza Party, The Lazy Way

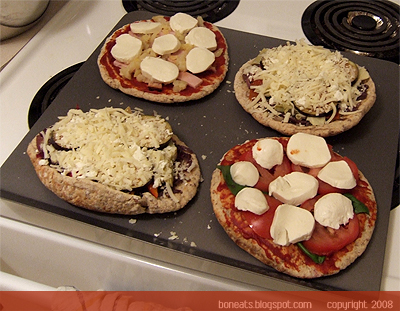
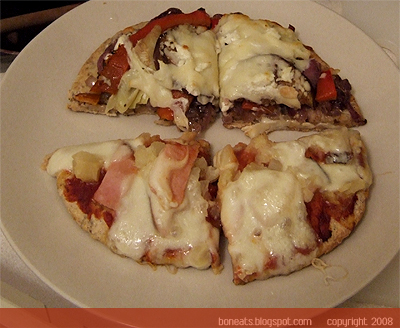
I’ve been craving some homemade pizza for some time now, but didn’t want to go through the trouble of actually making everything from scratch (ah, the lazy bum in me is starting to come out at this time of the year). I went to St. Lawrence Market on Saturday morning again, and picked up some lovely produce and ingredients to make gourmet pizzas. There’s so much to choose from during the autumn harvest, but I decided to make three different kinds of pizzas: Hawaiian, Margherita, and Caramelized Onions with Eggplant, Roasted Red Pepper and Artichoke.
My favourite kind of pizza as a kid was Hawaiian. I loved the combination of sweet and savoury (I still do), with the chunky pieces of juicy pineapple, salty ham and loads and loads of gooey mozzarella cheese. As I’ve grown older, and my tastebuds have grown more sophisticated, I’ve come to love gourmet pizzas with unique toppings. Perhaps my favourite gourmet pizza so far is one made at Vittoria Trattoria, a wonderful Italian restaurant in Ottawa’s Byward Market. Their Salmon pizza features apple wood smoked salmon, mozzarella cheese, braised leeks, fresh tomatoes and their to-die-for mascarpone dill sauce. It is simply divine!
The Margherita pizza is a classic in the Italian pizza canon. Originating from Naples, Italy, and named after Margherita of Savoy in the 1880s, the pizza Margherita is perhaps the easiest pizza to assemble, after the four-cheese pizza (Quattro formaggi). The traditional ingredients of the pizza Margherita are fresh basil, slices of fresh tomatoes, olive oil, sea salt, garlic, and slices of fresh mozzarella. My version is slightly different, in that I skipped the garlic, and I used a thin layer of tomato paste to allow my toppings to stick to the crust, since I was using Stonemill’s multigrain pita breads instead of actual pizza dough as my base.
With the Hawaiian pizza, I had picked up some lovely glazed oven-roasted back bacon, which in my opinion, is kind of like a cross between bacon and ham. Roughly chopped, I sprinkled the bacon over the pizza “crusts” that had been spread with some tomato paste, and then sprinkled some drained crushed pineapple on top, before topping it off with mozzarella cheese.
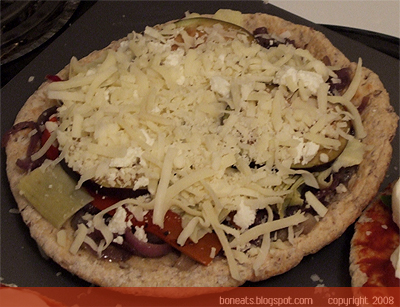
The last pizza was perhaps my favourite of the three. I caramelized 4 small onions with some thyme, spread them over the crusts, and topped them off with sliced roasted red pepper, chopped marinated artichoke hearts and sliced baby eggplants which had been brushed with some olive oil and balsamic vinegar. I then sprinkled some goat cheese on top, and finished it with a good dose of leftover Italian cheese mix I had lying around in the fridge. The flavours on this one were incredible. You had the sweetness of the onions contrasting with the slight tartness of the eggplant (thanks to the balsamic) and artichoke hearts, and the tanginess of the goat cheese.
So it is easy to make pizza when you’re strapped for time. You can do it my way and simply pick up some lovely Greek-style pitas, which make perfectly great pizza crusts. Or you can go to your local deli or pizza parlour and see if they sell frozen pizza dough, which also makes a great alternative.
Posted by Bonita at 3:52 p.m. 0 comments
Monday, August 18, 2008
Il pane italiano

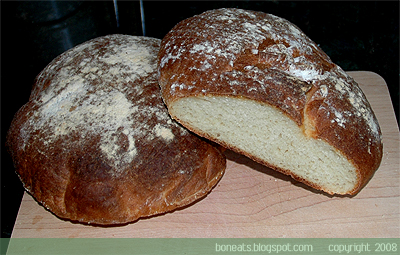
Sometimes you need a quick, reliable recipe to turn to for a quick fix, and easy bread recipes like French Country Style or this Italian Bread is always my go-to for an easy and fast route towards good, homemade bread. While it is quick and easy, and uses ingredients that are usually readily available in one's pantry (more so with the French Country Style), it does require a bit of planning ahead since both recipes call for a poolish, or a starter, a kind of "cheater's" version to a sourdough starter. The minimum time requirement to allow a starter to ferment is usually 4 hours, but I usually like to stretch it out to up to 16 hours. Therefore, if you're thinking of making bread the next day, it's best to mix together the poolish ingredients the night before and let it do its thing overnight. Remember, the longer you let your poolish ferment, the greater you maximize the flavour of your bread.
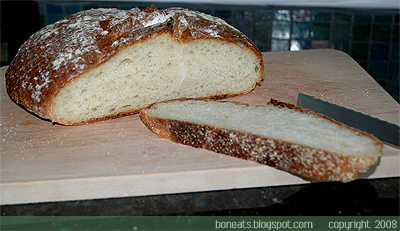
What's interesting to this recipe is that it uses dry milk powder, an ingredient I've only used before in fat-enriched breads like the Milk Loaf. The addition of the milk powder also adds another dimension of flavour to the bread, along with the poolish. The resulting loaf is one with an incredibly crispy exterior, a fine crumb and a chewy texture. This is great sliced thickly and slathered with butter, and makes a great sandwich bread.
Italian Bread
Adapted from The Fresh Loaf
Makes 2 medium loaves
Poolish
1/2 cup water, about 100°-115°F
1/2 cup bread flour
1/4 tsp dry active yeast
Dough
All of the preferment
2 1/2 cups bread flour, plus more as needed (up to 1/2 cup more)
1/4 cup nonfat dry milk powder
1/2 tbsp honey or brown sugar
1/2 tbsp salt
1 tsp dry active yeast
1/2 tbsp olive oil
1 cup water, about 100°-115°F
To start the poolish, mix together the flour, water, and yeast in a small bowl and cover with plastic wrap. Leave out at room temperature for at least 4 hours and as long as 16 hours.
To make the dough, dissolve the honey in the water, and then sprinkle the yeast over the water. Set aside for 10 minutes, or until foamy. Mix together the poolish, olive oil, salt, dry milk powder and yeast mixture in a bowl with 1/2 cup of flour. Mix thoroughly with a paddle attachment until creamy, about 1 minute. Mix knead in the rest of the flour a half a cup at a time until the dough starts to come away from the sides of the bowl. Switch to the hook attachment and knead in the remaining flour until you have a slack dough but one that is no longer sticky. Continue kneading until dough is smooth and elastic, about 10 to 15 minutes.
Place the dough in a well-greased bowl and cover with plastic wrap. Allow to rise at room temperature until at least 2 times in size, approximately 1 1/2 to 2 hours. Punch the dough down and let it rise again for half an hour.
Remove the dough from the bowl and divide it in half. Shape the dough into a ball or log, cover with a damp towel, and allow it to relax for another 20 minutes.
Shape the dough into its final shape. Cover again and allow to rise for another hour until doubled in bulk.
Meanwhile, preheat the oven and baking stone, if you are using one, to 475°F. Right before placing the loaves in the oven, score the top and brush or spray them lightly with water. Place them into the oven, immediately reduce the temperature to 425°F and bake for 15 minutes, spraying the loaves with water in 5 minute intervals for the first 15 minutes of baking. Rotate the tray and bake for another 5 to 10 minutes, or until the internal temperature of the loaf reads 200°F and sounds hollow when tapped from underneath. Reove from the oven and allow to cool on a baking rack for at least a half an hour before serving.