Showing posts with label comfort. Show all posts

Friday, January 20, 2012

Hearty Turkey Chilli

Surprisingly, this is my first time making chilli. Ever. I'm just not a chilli kind of girl really. But I needed a recipe that I could easily prep ahead of time and easily assemble on a weeknight with friends coming over for dinner. A one-pot dish was the answer, and with the blustery winter days upon us, I thought that a big pot of chilli would make for a casual, comforting weeknight dinner.

chilli_01

Saturday, April 24, 2010

"Baking" with a Waffle Iron

Instant gratification.

waffle cookies_01

That's what you get when you make cookies with a waffle iron.

Tuesday, April 13, 2010

Sunday Comforts

Don’t you just love lazy Sundays? You get to sleep in, lounge around in bed, treat yourself to a hearty brunch, stay in your pajamas all day, have no set agenda, and the highlight to what would otherwise be dull and uneventful day is Sunday dinner.

moroccan chicken_01

Saturday, March 6, 2010

Not-So-Humble Beans

humble beans_02

Beans are such a beautiful thing. Especially when you cook them from scratch. Forget the canned stuff that’s packed with sodium and whatever else that’s in there to help make them last longer on the shelf. Yes, it requires time, which, in our day and age, is so precious and few are willing to relinquish it. But here’s why you should cook beans from scratch:

Wednesday, January 20, 2010

A Date with Bananas

banana_date_loaf_01

There’s something really special about banana bread. No matter how many times I make it, I never get sick of making it. Nor do I get sick of eating it. And it’s such a great way to use up overripe bananas because honestly, who likes eating bananas when they’re all spotted and strongly smelling of…well…bananas? (At least I don't!)

Sunday, January 17, 2010

Broccoli Bisque

Simplicity at its finest. Broccoli. Leeks. Potato. Throw into a pot with some chicken stock. Simmer. Blend. Soup. Divine.

broccoli_bisque_01

It doesn’t have to be any more complicated than this. And why should it be?

Monday, January 4, 2010

Starting 2010 on the Right Track

Happy New Year everyone! It’s a new year, and a new look for my blog! I hope you like the makeover and will find it a bit easier to navigate your way through my blog in the future. I’m still getting used to it myself and still working out some kinks, but any feedback is always welcome.

hotpot_13

So what are everyone’s New Year’s resolutions for 2010? I don’t know if I believe in them anymore, considering I have a hard time falling through with them. But I always think it’s a good idea anyway to set some goals for one’s self at the start of a new year (hey, a new year, a new you, right?). Some food-related resolutions I hope to follow through on:

Sunday, November 29, 2009

Warm Comforts

“Chemistry like apple and cinnamon,
Like apple and cinnamon,
Like apple and cinnamon…”
– Utada Hikaru, “Apple and Cinnamon”, This is the One (2009)


nov28_01

There are some pairings that are just destined to be together: wine and cheese, chocolate and hazelnuts, and the wonderful combination of apples and cinnamon. There’s something incredibly comforting about this pairing: the tart-sweetness of the apples combined with the warmth of the cinnamon and the sweetness of the brown sugar just screams “comfort food.” And that’s what it certainly is on a cool fall/winter evening.

Apples, cinnamon and brown sugar also make for an easy yet absolutely delicious dessert in the form of an apple crisp. My brother had picked up some lovely baking apples for me a few weeks back, but I hadn’t had time to do anything with them in the last little while. However, I was craving some kind of apple dessert this week. I originally had ambitious plans to make an apple pie or galette on a weeknight, but after getting home and feeling too tired from work, I quickly scrapped that plan. The alternative was a quick and easy apple crisp. You get the satisfaction of warm baked apples without the work and less calories too (swapping the butter/shortening-laced pastry for a healthier oatmeal and nut topping)! Wonderful on its own, with a drizzle of maple syrup for some added sweetness, or with a scoop of whipped cream or vanilla ice cream!

nov28_02

Apple Crisp
Serves 6

4 to 5 medium to large baking apples, peeled, cored and sliced
1 tbsp fresh lemon juice
6 tbsp brown sugar
2 ½ tsp cinnamon
½ tsp vanilla extract
Good splash of brandy (optional)

Topping:
1 cup large rolled oats
2 tbsp whole wheat pastry flour (or all-purpose flour)
6 tbsp brown sugar
1 tsp cinnamon
½ cup walnuts or pecans, chopped (optional)
1/3 cup butter, melted

Preheat oven to 375°F. In a mixing bowl, combine apples, lemon juice, brown sugar, cinnamon, vanilla extract, and brandy. Toss to combine.

Place apples into a 9-by-9-inch baking pan, ensuring that it is evenly spread out.

In another bowl, combine rolled oats, flour, brown sugar, cinnamon, and nuts. Pour in the melted butter and stir until you have a crumbly mixture. Sprinkle evenly over the apples.

Bake for 55 minutes to 1 hour, or until topping looks crunchy and apples are tender. Remove from oven and let rest 5 to 10 minutes. Serve with whipped cream or vanilla ice cream, if desired.

To reheat leftover apple crisp the next day, just throw in a preheated 350°F oven for 15 to 20 minutes.

Thursday, November 26, 2009

Fully Loaded

nov26_02

That’s the best way I can describe this lasagna. Why? Because it’s just about bursting out of its pan, trying to keep in all the goodness that I’ve managed to pack into it. My parents are visiting this week and my mom mentioned how she would love to have some lasagna, something she wouldn’t make on her own. And since my mom spoils me with her wonderful cooking when they visit, I thought I would return the favour.

What I love about lasagna is that it is such an easy dish to prep ahead of time. I made this the night before and merely had to leave the baking instructions with my mom. I used some frozen homemade tomato sauce with Italian sausages, spices and swiss chard added to it. Sautéed some mushrooms and extra swiss chard and added them to the thawed chopped spinach. Layer pasta with ricotta, the veggies, sauce, cheese, and repeat. Bake immediately, stick in the fridge for dinner the next day, or freeze for future consumption or last minute dinner guests. Best of all, you can always count on leftovers!

nov26_03

Fully-Loaded Lasagna
Serves 6 to 8
Adapted from
Martha Stewart

2 cups light or full-fat ricotta cheese
1 large egg
¼ tsp freshly ground nutmeg
Salt and freshly ground black pepper
1 package (10 ounces) frozen chopped spinach, thawed and squeezed to remove excess moisture
3 cups homemade or good-quality store-bought tomato sauce
1 to 2 cloves garlic, minced
8 to 10 medium to large mushrooms, roughly chopped (optional)
Herbs and spices of your choice (optional)
8 to 9 no-boil whole wheat lasagna noodles
2 cups grated cheese (either mozzarella or a mix of your favourite)

Preheat oven to 400°F. If your lasagna noodles requires pre-soaking in cold water, do so now.

In a medium sauté pan, heat olive oil over medium heat. Add garlic and mushrooms and sauté until soft, about 5 to 8 minutes. Set aside.

In a medium bowl, whisk together ricotta cheese, eggs, ¼ tsp nutmeg, ½ tsp salt and ¼ tsp pepper. Add spinach and mushrooms, and stir well to combine.

Spread a small bit of tomato sauce in the bottom of an 8-by-8-inch glass baking dish. Arrange a layer of lasagna noodles on top, breaking the noodles as needed so that they fit into the dish. Spread 1/3 of the ricotta mixture over the noodles, followed by 1/3 of any other sautéed vegetables or meat you wish to add (if desired), followed by 1/3 of the remaining sauce; sprinkle with 1/3 of the grated cheese. Repeat to make two more layers, ending with cheese. If freezing, cover tightly with plastic wrap. Before baking, defrost in the refrigerator overnight.

Cover with aluminum foil. Bake 30 minutes. Remove foil; continue baking until top is golden brown, about 15 to 20 minutes more. Let cool 10 minutes before serving. If lasagna has previously been frozen, be sure to remove lasagna from the fridge an hour before baking, and add 10 more minutes to the baking time.

Saturday, November 14, 2009

“White Carrots”

nov14_01

Fall is the prime time for root vegetables, and one of my favourites is parsnip. As a kid, I used to think they were merely “white carrots”, and while they aren’t exactly carrots, they are in the same family, so I wasn’t uttering complete nonsense! Parsnips also have a sweeter and more distinct flavour.

My mom used to throw a couple of parsnips into chicken soup, but as I grew older, we started roasting them as well. But thoughts of parsnips in soup was on my mind again when I picked some up from the market. And so I made Potato and Parsnip Soup, as featured in the Autumn 2008 issue of Food & Drink magazine

It was so easy to make. Throw everything in a pot and half an hour and some blending later, you have soup! It’s light and very tasty, showcasing the natural sweetness of the parsnips. The addition of carrots helps to give the soup a beautiful yellow tint. The soup is quite thick though, so I did add quite a bit of water to reach a consistency I was happy with. Best of all, the soup freezes well, so you can make a big batch and have some on hand to serve to last-minute dinner guests!

You can find the recipe here.

Saturday, October 31, 2009

Move Over Spinach…

oct31_01 copy

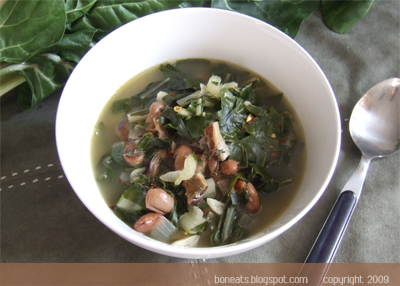
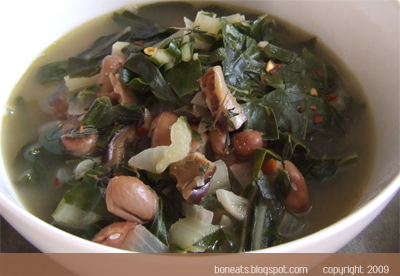
A thought occurred to be when I stepped into the door and stared at treasures I had brought home from the market—What the heck am I going to do with all this Swiss chard? Ironically, it was my first time cooking with and eating Swiss chard. Imagine the horrors of it if I hated it.

What made me bring home so much Swiss chard in the first place was all thanks to the November 2007 issue of Cooking Light. I came across a recipe for an Italian White Bean and Spinach Soup, which looked delicious—something warm and cozy that I can bring to work for lunch. But it was past prime spinach season, so I decided to substitute Swiss chard for the spinach, and here is where my story all began.

The soup comes together very quickly, and is chock full of wonderful veggies. The addition of the shiitake mushrooms adds complexity to the flavours, giving it a rich, earthy tone. I recently rediscovered my red chilli flakes in my cupboard, so add a dash if you like a little kick. And this soup can easily be made more substantial by adding some pancetta, bacon or smoky chorizo sausage.

oct31_02 copy

Swiss Chard and Bean Soup
Adapted from Cooking Light, November 2007
Serves 6


1 ounce dried shiitake mushrooms
2 cups cold water
1 tbsp olive oil
1 cup chopped yellow onion
2 cloves garlic, minced
½ tsp red chilli flakes (optional)
4 cups packed fresh Swiss chard, chopped
1 tsp fresh thyme leaves
1 16-ounce can Romano beans, or other white beans, rinsed and drained
1 14-ounce can organic vegetable or chicken broth
Fresh thyme, for garnish (optional)
Red pepper flakes, for garnish (optional)
Freshly ground black pepper, to taste

Combine mushrooms and 2 cups cold water in a bowl; cover and let stand for at least 2 hours. Remove mushrooms from the water, squeezing as much excess liquid out of them as possible and reserving the liquid. Reserve the stems. Chop mushrooms and set aside.

Heat olive oil in a large nonstick saucepan over medium-high heat. Add onion, garlic, red chilli flakes and mushrooms (including the stems); sauté 5 minutes or until tender. Add the reserved mushroom liquid, Swiss chard, thyme, beans, and broth. Bring to a boil. Cover, reduce heat, and simmer for 10 minutes.

Remove the mushroom stems. Serve in warmed soup bowls and garnish with thyme and red chilli flakes, if desired.

Tuesday, October 27, 2009

Waking Up on the Right Side of the Bed

oct27_01 copy

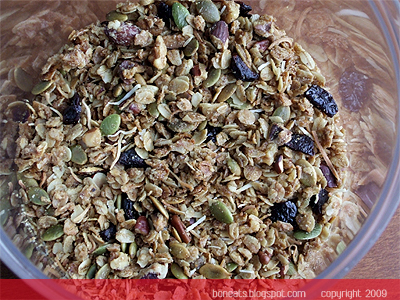
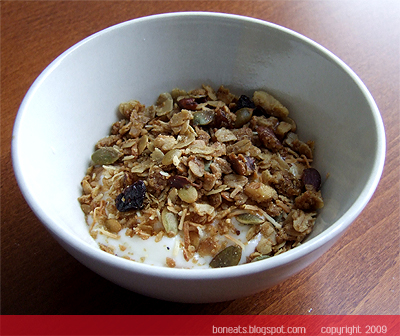
It never really occurred to me to make my own granola until now. Every couple of months, when I went through my box of granola, I would simply go to the store and pick up another box. It was fast and convenient. And sadly, that’s what the majority of consumers have accepted nowadays, the fact that it's convenient to get just about anything. Why bother to make your own, right? Well, for one thing, it’s so much healthier for you because you know what you’re putting into your food without all those additives and unnecessary fats and sugars. But more importantly, it’ll taste a thousand times better because you can never beat the taste of homemade.

A friend made some granola a few weeks back, which made me determined to make my own. I finally found some down time this weekend to make some hearty granola. I came across this recipe and thought it would make a great base for my granola. Let me just say how incredible your house will smell as the granola bakes. It’ll be hard to keep your fingers away from the granola as you take it from the oven and allow it to cool. Sprinkle over your morning yogurt, cottage or ricotta cheese, or ice cream, or pack a small handful to snack on in the afternoon.

oct27_02 copy

Hearty Granola
Adapted from Adventures in Shaw
Makes about 5 cups granola


3 cups oats (the large variety)
1 cup unsweetened coconut flakes, lightly toasted
½ to ¾ cup dried cherries, cut in half if large (or you can substitute dried cranberries)
1 cup raw pumpkin seeds
1 cup assorted nuts (whole almonds, walnuts, pecans), chopped
½ cup pure maple syrup
¼ cup olive oil
¼ cup packed light brown sugar
1 tsp kosher salt
½ tsp ground cinnamon
½ tsp ground cardamom
½ tsp ground nutmeg

Preheat oven to 300°F.

Spread coconut onto a baking sheet in a single layer. Toast the coconut in the oven until they start to turn a light golden brown. Keep a close eye on the coconut, since it’ll quickly take on colour the minute you turn away from it. Set coconut aside to cool.

In a large bowl, combine the oats, pumpkin seeds, nuts, spices, salt, and sugar. Stir everything together. Fold in the oil and syrup and stir until everything is evenly coated.

Spread the granola in a single on two non-stick baking sheets. Bake for 45 minutes, stirring every ten minutes, until golden. Remove sheets from oven and allow to cool thoroughly. Toss with the toasted coconut and dried cherries.

Sunday, September 27, 2009

Slowing Things Down

Summer has come and gone (although this year, I really feel like I completely missed it. Besides those three weeks in August, where was it?). With the fall season and cooler weather upon us, there's nothing that makes me more giddy than slow cooking. Whether it's something roasting in the oven or bubbling on the stovetop, the warmth and smells that emanate throughout your home. And cool weather screams a hot bowl of homestyle soup to snuggle up with.

sept27_01 copy

Chinese soups in the Canton cuisine (the cuisine I grew up with at home and am most familiar with out of all the various types in Chinese cooking) are slow affairs. Called "老火湯" (literally translated as "old fire soup"), these Cantonese soups are often boiled for hours over a hot stove with some form of protein and bones (pork bones, chicken, chicken feet, etc.) and vegetables for flavouring. Additional Chinese herbs will then be added, making these soups not only delicious, but beneficial to one's health as well. By cooking the soup for a long period of time, the water evaporates, leaving a very concentrated and incredibly flavourful (and nutritional!) broth by the end.

Best of all, slow-cooked Chinese soups are the easiest thing to make. Simply throw everything into a pot and let the stove do all the work for you! You have the rest of the day to clean the house, do the laundry, run some errands or just sit back and catch up on your reading.

If making a pork-based soup, I often like using shoulder ribs. It has bone to give the soup that depth of flavour you want, but also carries with it a good portion of meaty goodness which you can munch on later (while still remaining tender without being all dried out). Ask your butcher to cut them into smaller pieces for you. And be sure to blanch the pork ribs before you make the soup—you don't want to end up with a bloody and metallic tasting soup. When serving the soup, be sure to serve some of the meat and vegetables alongside it (we Chinese folks love that!). Sprinkle with some sesame oil and soy sauce if you wish. Give this sweet corn and pork ribs soup a try. It's good for you, and the naturally sweet broth will be a nice surprise for you.

sept27_02 copy

Sweet Corn, Carrot and Pork Ribs Soup
Serves 4

500 g pork shoulder ribs, cut into large chunks (ask your butcher to do that)
2 corn on the cob
2 large carrots
4 dried red dates **
5 to 6 dried logan (optional) **
3 litres filtered water
Salt, to taste

Before you begin to make the soup, blanch the pork ribs in a large pot of water for about 10 minutes to get rid of the blood and any impurities. Rinse and set aside.

In a large stockpot, bring water to a boil. Add all the ingredients and bring to a boil again, then reduce to a simmer over medium-low and let simmer for about 3 to 4 hours. The water should have reduced by at least half by the time it is ready. If water has reduced too fast, just add a little more.

Before serving, season with salt. Serve immediately, and serve the meat and vegetables on the side, sprinkling with some sesame oil and soy sauce if desired.

** NB. Available in Asian supermarkets and Chinese herbal medicine shops.

Tuesday, September 22, 2009

The Tomato Marathon

"Double, double toil and trouble,
Fire burn, and cauldron bubble."
-- William Shakespeare, Macbeth (IV.i.10-1)

sept22_03 copy

So I did roast a double batch of tomatoes. The cauldron (er...the dutch oven) did bubble just a little. And if you imagine my electric oven to be the fire, then yeah, it was burning pretty much all day. But this tomato sauce is anything but toil and trouble, and thank goodness for that!

I went to St. Jacobs' Farmers' Market last week (just outside of Waterloo). I used to love going to that market--it is always bustling with people, there is loads of beautiful fresh produce available for a cheap price, and the fact that it's out in the open and practically out in the countryside makes the atmosphere that much more charming. But ever since my brother graduated from university and left Waterloo for bigger and better things, I haven't had the chance to go back until now. It's still as I remembered it, and still just as bustling, even on a weekday.

sept22_01 copy

I used to always watch others haul around large sacks of tomatoes and peppers from the market. St. Jacobs' likes to sell things by the bushel, any home canners' and preservers' dream. So I thought, "What the heck, why don't I buy a bushel of tomatoes myself? Make some tomato sauce. In my teeny, tiny closet of a kitchen..."

I found this wonderful Slow-Roasted Tomato Sauce recipe over at Cuizoo, and I knew they were just calling out to my own plum tomatoes. Best of all, it required minimal work: no blanching, no peeling, and no seeding! Three steps saved--and those steps are usually the most painful process of making tomato sauce. By slow roasting them, you also allow the sugar in the tomatoes to caramelize, creating a richer, sweeter flavour. It may seem like a long time in the oven, but trust me, all you have to do is cut up the tomatoes and other vegetables, stick it in the oven, and sit back and relax while the tomatoes do their magic. Tomato sauce has never been this easy.

sept22_02 copy

The smell that is created from the tomatoes, onions, garlic, oregano and balsamic is absolutely divine! And when they come out of the oven, they are so soft and ready to be pureed into some fabulous sauce. Once pureed and back in the pot, add a good slug of red wine and any other herbs and additions you'd like (ground meat, meatballs, red chilli flakes, mushrooms, etc.). It's a little sweeter than your usual tomato sauce you'd find in a can or a jar, but the flavours will blow you out of this world. If you prefer your sauce on the acidic side though, perk it up with a little lemon juice, red wine vinegar or balsamic vinegar. Enjoy immediately with some pasta, and can or freeze the rest for later in the winter!

sept22_04 copy

With the abundance of tomatoes I brought home, I still had lots leftover to make some soup. I apparently didn't get enough roasting action yesterday so I roasted some more today to make a Roasted Tomato Soup, served alongside a grilled cheese and tomato sandwich. A classic combination, and perfect for welcoming the first day of autumn.

sept22_06 copy

Roasted Tomato Soup
Adapted from Gourmet, March 1993
Serves 4


3 lbs plum tomatoes, quartered lenghtwise
5 to 6 cloves garlic, unpeeled
1 large shallot, finely chopped
Olive oil
Sea salt and freshly ground black pepper
1/2 tsp dried oregano, crumbled (or 1 tbsp fresh oregano)
2 sprigs fresh thyme, leaves removed from stalks
1 bay leaf
1 1/2 cups low-sodium chicken broth, plus more if needed
1 to 2 tbsp honey (optional) **
Handful fresh basil

Preheat the oven to 350°F. Spread the tomatoes, skin side down, in one layer in a roasting pan, add the garlic. Drizzle with a little olive oil and season with salt and pepper. Bake the tomatoes and garlic for 45 minutes to 1 hour, or until the tomatoes are very soft and their skin is dark brown and blistered. Let the tomatoes and garlic cool a little in the pans.

Heat some olive oil in a heavy saucepan over medium heat. Cook the shallot, oregano and thyme, stirring, until the shallot is soft. Add the tomatoes, garlic (skins discarded), bay leaf, and 1 1/2 cups of the broth. Season with salt and pepper, and simmer the mixture, covered, for 15 minutes.

Remove the bay leaf. In a blender, puree the soup in batches until very smooth. Force pureed mixture through a fine sieve set over the clean saucepan. If soup appears a little thick, thin it out with some broth. Add the honey (if needed), stir in the basil, and season again with salt and pepper if required. Serve hot sprinkled with some freshly grated parmiggiano-reggiano.

** NB: I find the honey helps cut back on the acidity of the tomatoes, giving for a much smoother taste overall. You may find that honey is unnecessary if you have extra sweet tomatoes, so be sure to taste the soup before deciding whether it is needed or not. Alternatively, you can add a dash of cream, which will also help mellow out the acidity.

Sunday, September 13, 2009

Eggs For Dinner

sept13_01 copy

Tomatoes and eggs (西红柿炒鸡蛋) are such a classic combination in this simple but tasty traditional Chinese dish. I actually didn’t grow up eating a whole lot of this, as it’s actually a dish that’s more popular in the mainland (and I grew up with Guangzhou/Canton region cuisine), but I have often heard of it, and my mom did sometimes make a variation on this. She would stir-fry the tomatoes and pour it over eggs that were fried over-easy, and serve it with ham and rice.

It may seem like an odd combination, but the velvetiness of the tomatoes works really well with the creaminess of the eggs. The natural sweetness of the tomatoes also helps balanced the seasoned eggs. This dish is so easy to make, is super healthy and won’t chew away at your wallet, especially when you’re buying fresh ripe tomatoes at the peak of its season (right now!). It was certainly a great way for me to use up my overripe tomatoes. For a more refined version, you can always blanch and peel the skins off the tomatoes, but I’m not too picky. Find the recipe at Rasa Malaysia.

sept13_02 copy

Monday, September 7, 2009

Autumn Comforts

Is it September already? Where did the summer go? Oh wait, we didn’t get a summer! As much as summer was disappointing this year, I’m glad fall is slowly encroaching upon us. The fall colours, the harvest, the cool, crisp air--it’s perhaps my favourite season, and the cooler weather always brings to mind warm comfort food. I couldn’t help picking up some beautiful sausages at the farmer’s market the other day, and with some sauerkraut sitting in my pantry, it was time to whip up a batch of sausages and sauerkraut.

sept07_01 copy

Sauerkraut is a bit of an acquired taste if you’re not used to it. It is a type of fermented cabbage, and because of its fermentation, contains a number of lactic acid bacteria, vitamin C, and other nutritional benefits. I was introduced to sauerkraut at a fairly young age, so I never had a problem with it, although I have known others who are put off by the smell and taste. Cooked with some bacon, sausages and apples though, the sauerkraut absorbs the smokiness and savouriness of the sausages as well as the sweetness of the apples, making for a delightful combination of flavours. I also find that it’s the perfect accompaniment to sausages, as the sweetness and sourness of the sauerkraut cuts the saltiness and fattiness of the meat.

I didn’t have all the ingredients in my pantry to make a traditional choucroute garni, but here’s my adaptation for quick and easy sausages and sauerkraut.

sept07_02 copy

Sausages and Sauerkraut
Serves 2 to 3

4 to 6 assorted sausages, scored 3 to 4 times to prevent bursting
1 large onion, thinly sliced
2 to 3 slices bacon, chopped
1 796-ml jar sauerkraut, rinsed and drained
1 cup white wine
1 cup apple cider (or apple juice)
¼ tsp ground allspice
1 tsp crushed whole peppercorns
½ tsp whole cloves (optional)
½ tsp caraway seeds (optional)
1 to 2 cooking apples, cored and sliced (optional)
Sea salt and freshly ground black pepper, to taste

Prevent oven to 350°F. Heat some olive oil in a heavy ovenproof pan over medium heat and brown the sausages, about two to three minutes per side. Remove the sausages, add the onion and bacon and cook until the onion is translucent and the bacon crispy, about 5 minutes. Add the remaining ingredients and bring to a simmer.

Place the sausages on top of the sauerkraut, cover the pan and bake for 40 to 45 minutes. Serve immediately with Dijon or whole-grain mustard and fresh bread.

Wednesday, February 25, 2009

In Search of Perfection

feb25_01 copy

Everyone has their ideal chocolate chip cookie. For me, I love the rich, buttery kinds with not too many chocolate chips, heavy in vanilla and slightly undercooked to yield soft and utterly chewy cookies, perfect with a cold glass of milk. The chocolate chip cookie has probably been the one recipe I’ve fiddled with the most over the years, and I’m still not satisfied with it. No matter how I try, I can never get the perfect cookie. They are always great fresh out of the oven, but the satisfaction-factor is short-lived.

Enter my classmate Rowan. He makes the most fabulous cookies I’ve ever taste. They are so soft, unlike any of my cookies that have ever come out of the oven. He swears there is no secret, despite “beating the s--- out of them,” but I’m convinced he’s holding something back! Despite comparing notes, I couldn’t find anything different from my own base recipe (I work off the popular Nestle Tollhouse recipe). Oh well! This only means that I can bother Rowan every couple of weeks, along with the rest of the class, to bake us another batch of his delicious cookies!

feb25_02 copy

I did track down this recipe that gives me a cookie similar to Rowan’s. The ingredients are pretty much the same as any standard chocolate chip cookie recipe. The only big difference is that the recipe melts the butter, and uses 1 whole egg plus an egg yolk. Fresh out of the oven, these babies are super gooey and chewy—the closest I’ve come to producing my dream chocolate chip cookie.

  © Blogger templates 'Neuronic' by Ourblogtemplates.com 2008

Back to TOP