Thursday, July 31, 2008

Pear and Almond Tart
july30_01 copy

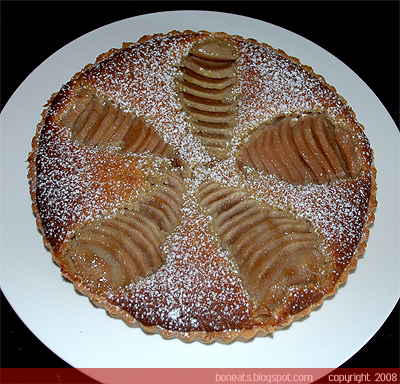
If you're new at making tarts, this is definitely the perfect recipe to try out, because it's practically fool-proof. I used to have an aversion to making tarts and pies, mostly because I used to hate making the pastry dough. Most pastry doughs out there calls for cold butter, ice-cold water and minimal handling, and often than not, my doughs turned out crumbly and dry, making it impossible to roll them out and lay them out in my pan nicely. However, I've made this tart recipe numerous times now, all of which were successful. The recipe calls for room temperature butter, a mixer, the creaming method and no refrigerating prior to rolling out the dough. What you get is a soft but very easy to handle dough that rolls out beautifully, and more importantly, comes out of the oven rich, buttery and tender.

july30_02 copy

The combination of almonds and pears is incredible; for some reason, the scent and flavour of pears just goes so well with almonds. But then again, almonds is such a versatile nut that can go with just about anything, and with that said, it makes this tart just as flexible with a number of fresh fruits that is available during a particular season. You can substitute the pears with fresh figs, plums, peaches, apricots, apples, or as I have done in the past, cherries. What's that you say? It's the dead of winter and impossible to find some fresh, beautiful fruit? This can just as easily be made with canned pears or peaches, as long as you make sure to drain the fruit well before topping it on the tart.

For this tart, I used forelle pears, since they are in season at the moment. They are a sweet pear, although not as fragrant and juicy as other varieties like bartlett. Bosc or Anjou pears are usually preferred for poaching or baking because they are of the firmer variety, and tend to keep their shape better even after being exposed to heat. However, you can just as easily use other varieties of pears as long as you make the proper adjustments in the cooking process to ensure that you pear doesn't end up as mush.
july30_03 copy

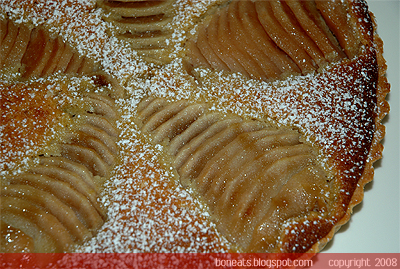
I love how this tart looks after it comes out of the oven. It's such a simple dessert, but the fanned pears just makes for a beautiful presentation. Dust with a bit of confectioners' sugar just before serving and this is fit for company. Trust me, if you want to get over your fears of making tarts, definitely give this recipe a try. Not only is it super-easy, but it's absolutely delicious and it'll have you making this tart over and over again.
Tuesday, July 29, 2008

Going Quackers Over Duck

july29_02 copy

We used to have duck every once in a while, picking up a roast duck from a Chinese BBQ shop from time to time. I used to love the stuff; tender, flavourful meat and its coveted crispy, super-delicious skin. However, we've had it less and less frequently as I got older, mostly because I wanted to stay away from the fatty duck, as delicious as it is. Neither do we make duck at home, thus our only opportunity to eat duck is when we dine out. My dad requested duck for his birthday, and I was happy to oblige the birthday boy. I personally have never worked with duck before, so making duck breast rather than roasting a whole duck would be easier for me to handle.

july29_01 copy

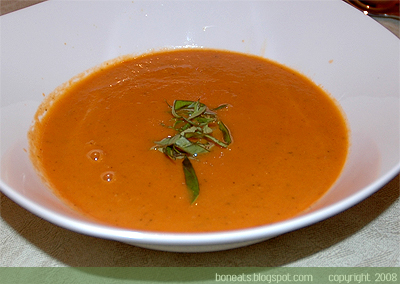
The meal started off with a Cream of Tomato Soup, a perfect way to highlight fresh, sweet summer tomatoes. The soup doesn't use a lot of cream, which keeps this pureed soup on the lighter side. The addition of garlic, onions, a bit of tomato paste and various herbs helps intensify the flavours of the soup. Served some homemade Herb & Garlic Focaccia, great to soak up the remnants in the soup bowl!

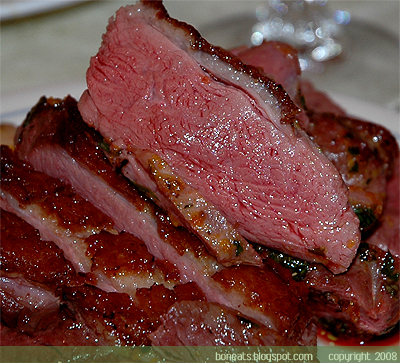
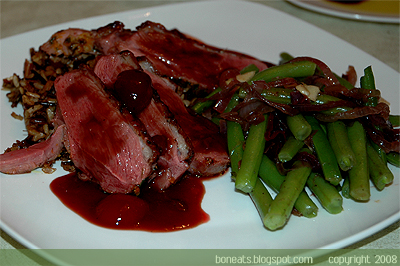
After a bit of digging around, I decided to settle on Duck Breast with Port-Cherry Sauce, since I had all the ingredients (besides the duck breasts) readily available in my pantry. I did divert from the original recipe a bit. I added a bit of morello cherry preserves that was sitting in the fridge to heighten the cherry flavour in the sauce; it added some sweetness to the sauce, as well as a hint of cinnamon which surprisingly tasted delicious on the duck. I also boiled down the sauce for over an hour, much longer than the suggested 15 minutes, which really helped to concentrate all the flavours. The recipe also asked that the duck be marinaded in a soy sauce-based marinade, which I thought would be too overpowering for the duck and the sauce. Instead, I did a dry rub of orange zest, parsley and thyme. As we all know, orange and duck are a classic pair, so the orange zest on the duck breast was a delicious addition to the gamey-ness of the duck meat.

I rendered off the duck fat for about 8 minutes, and then finished them in the oven for another 6 to 7 minutes for medium-rare. (The duck breasts I used were super thick. You should adjust the time accordingly depending on the size of your duck breasts.) Sliced the breasts and served them with a Wild & Brown Rice Pilaf and Green Beans with Caramelized Onions & Almonds, along with the port-cherry sauce. The flavours of the duck and the sauce were superb, and I was glad that we had some extra duck leftover for the next day; it's just as delicious cold and served on top of a mixed green salad.

july29_03 copy

If you want, you can always store the rendered off duck fat in the freezer for use later on. Duck fat, as scary as it is, is packed with flavour, and makes any dish taste even better when it is substituted for butter. Granted, I'm not suggesting you use duck fat every day, unless you want to clog up your arteries, but for those rare special occasions, it doesn't hurt to amp up the flavour-metre.

Sunday, July 27, 2008

Change is Good

Sheryl Crow tells us that "a change would do [us] good" ("A Change Would Do You Good", Sheryl Crow, 1996), and so I put this advice to practice by switching up our usual Sunday brunch routine of pancakes and bacon to a more fancy, upgraded brunch entree. It's no secret by now that I love pancakes, considering I'm constantly rambling on about pancakes--its variations, the different toppings and additions, etc.--but with my dad's birthday being tomorrow, I thought I would make him his favourite, that being waffles.

july27_01 copy

Don't get me wrong, I like waffles too, and it's great how versatile waffles can be. Serve them with syrup or fresh fruit and it makes for a wonderful brunch; pop frozen leftovers in the toaster for an easy on-the-go breakfast; serve with a scoop of your favourite ice cream and a drizzle of chocolate fudge sauce for an instantaneous dessert; or make them with less sugar for a savoury version.

Regardless of how you like to enjoy your waffles, they are just as easy to make as pancakes, and comes with a nifty gadget to play with: the waffle iron. Since waffle batter is very similar to pancake batter, it is not the process of making it (or eating it for that matter!) that is a turn-off for me, it's the aftermath. The clean-up job required when all the waffles are done, and the iron has been unplugged, can leave me with such a headache that I often ask myself, "Why didn't I just make pancakes instead?"

Making waffles takes a little practice: too little batter and you won't get the "perfect" waffle, but too much batter and you'll get a lava-flow of batter oozing out of the iron and onto your counter. As delicious as waffles can be, those happy thoughts can quickly be forgotten when you find yourself standing in front of a waffle iron crusted with oozy batter, or its remnants in the form of dried, crusty leftovers stuff to the sides of the iron. Hence, waffles at my house have now become a rare occassion, and when I do find the heart (and time) to dig out the waffle iron, I make sure to make a larger batch so that I can stash a bunch of waffles in the freezer to last us a couple of weeks.

july27_03 copy

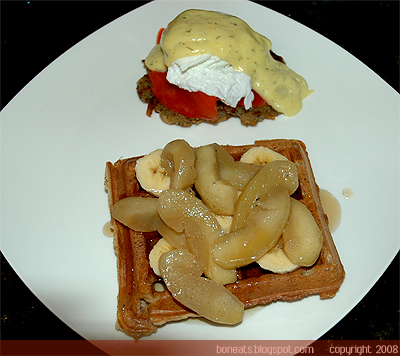
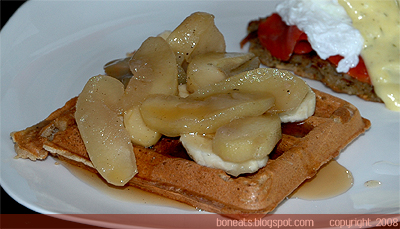
I added pecans and some pumpkin pie spice to the waffle batter, but you can just as easily replace the pumpkin pie spice with cinnamon, or leave out the nuts and spice altogether. I served these babies with some sliced bananas, warm apple compote and maple syrup.

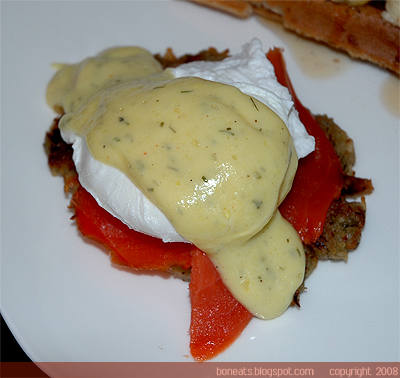
To balance off the sweetness of the waffles, I also made something savoury for the taste buds, a variation on the classic Eggs Benedict. I made some Herbed Potato Rosti the night before and simply reheated them in the toaster oven this morning. Topped the rosti with a few slices of smoked salmon, a poached egg and dill hollandaise sauce. This is definitely a dish that'll easily impress anyone without having you to go through a lot of trouble to make!

july27_02 copy

Spiced Pecan Buttermilk Waffles
Adapted from Food & Drink, Early Summer 2002
Makes about 10 to 12 waffles

2 cups all-purpose flour
1 tbsp brown sugar
2 tsp baking soda
2 tsp baking powder
1 tsp salt
1 tsp pumpkin pie spice, or ground cinnamon
4 eggs, lightly beaten
2 cups buttermilk
2 tbsp melted butter, or vegetable oil
1 tsp vanilla extract
1/2 to 3/4 cup toasted pecans, chopped

Lightly grease and preheat waffle iron.

Place flour, sugar, baking soda, baking powder, salt and pumpkin pie spice in a medium bowl. Stir with a whisk to combine.

Pour the lightly beaten eggs onto flour mixture, and pour buttermilk, vanilla extract and melted butter (or oil) on top of eggs. Gently stir ingredients together until they create a lumpy batter. Do not over mix.

Sprinkle about 2 tbsp of the chopped pecans onto the waffle iron. Spoon 1/3 to 1/2 cup batter into prepared waffle iron and bake for about 3 to 4 minutes, or until crisp and golden. Repeat using remaining batter. Keep waffles warm on a baking rack in a 200°F oven until ready to serve.

Tuesday, July 22, 2008

Maple Oatmeal Bread

One of my favourite comfort foods as a child was oatmeal. Yes, that thick, gooey sludge that is known as oatmeal. Hard to believe that I liked it as a kid since it is often a stigma that kids are repulsed by "healthy" food. But my mom made such great oatmeal, made with warm milk and sweetened with sugar. It was certainly a treat to have on a cold winter's morning.

july22_01 copy

I don't have oatmeal much nowadays, since my comfort food of choice now are pancakes drenched with sweet maple syrup. Thus, when I came across this recipe for Maple Oatmeal Bread, I thought it was a happy medium between my favourite childhood comfort food, and my favourite comfort food of today. Maple syrup is often drizzled on top of hot, steaming oatmeal, so I thought that the combination of the two ingredients couldn't be bad either.

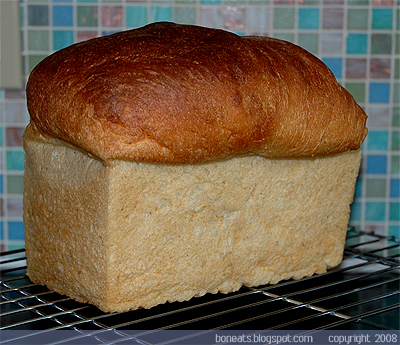
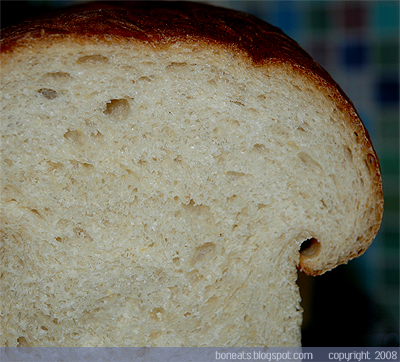
What I got when I pulled the loaves out of the oven were two extremely soft breads. I thought that with the use of rolled outs, the bread would have a sturdier texture, much like if you use whole wheat flour, but I was surprised (and delighted!) to find how incredibly soft the texture was. The maple syrup loses its distinct maple flavour, but it adds a nice sweetness to the bread. Next time, I'll probably replace some of the bread flour with whole wheat flour to make this bread even more healthy.

By letting the rolled oats stand in the boiling water for an hour, the water moistens the dried oats, making an "oatmeal" like paste, as well as starts the fermentation process. This step really helps add moisture to the bread. Because of the amount of moist ingredients used in this recipe, the dough will be considerably tackier than some other bread doughs you've handled in the past. Don't despair thought; just be patient during the kneading the process, and be sure to flour your work surface well before turning out onto your counter. And trust me, despite the slight sticky mess the bread will leave behind, it'll all be worth it when you turn those loaves out of their pans and bite into a cottony-soft slice, slathered with butter, jam, or just as is.

july22_02 copy

Maple Oatmeal Bread
Adapted from The Fresh Loaf
Makes 2 to 3 loaves

2 ½ cups boiling water
1 cup rolled oats
2 ½ teaspoons active dry yeast
3/4 cup maple syrup
2 teaspoons salt
1 tablespoon vegetable oil
5 cups bread flour

Put the oats into a bowl. Pour the boiling water, reserving about 1/4 to 1/2 cup of the water, over the oats and set aside for an hour.

In a small bowl, mix 1 teaspoon of the syrup with the reserved water, warmed to 100° to 115°F. Sprinkle the yeast on top and set aside to let foam for about 10 minutes. In the bowl of a stand mixer, mix the soaked oats with the syrup, salt, oil, yeast mixture and 1/2 cup flour. Using the paddle attachment, mix the ingredients until a smooth batter forms. Gradually add in the flour 1/2 at a time, mixing well to incorporate after each addition, until the dough starts to come away from the sides of the bowl.

Switch from the paddle to the dough hook, and machine-knead for about 15 minutes, adding the remaining flour. You may add an additional 1/2 cup flour as needed to reach the right consistency; you want your dough to be tacky, but not completely sticky. Place the dough in a large, well-oiled bowl, cover with plastic wrap, and set aside to rise for 1 1/2 to 2 hours, or until doubled in size.

Punch down dough and divide the dough into two (or three) and shape the loaves. Place the loaves in greased 9 x 5 loaf pans, cover the pans loosely with plastic or tea towel, and set aside to rise again for 60 to 90 minutes.

Bake at 350°F for 40 - 50 minutes. If the tops are browning too quickly halfway through the baking time, cover the bread with aluminum foil. Take out of oven and let rest for 20 minutes. Turn the loaves out onto wire racks and let cool completely.

Sunday, July 20, 2008

Summerlicious '08, Part II

My Summerlicious adventure continued the next day with lunch at Senses, located near Rogers Centre (aka Sky Dome) on Wellington St. W. at the SoHo Metropolitan Hotel. I used to frequent the Senses bakery over at Bayview Village to buy their delectable pastries, but that store has since closed down for a few years now. Luckily, they still had a shop open in the downtown district, but with the crazy traffic in Toronto, it just isn't worth driving all the way to downtown in heavy traffic just for a slice of cake, as delicious as it may be.

july19_08 copy
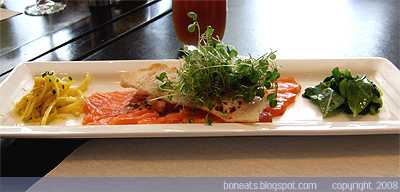
Citrus-Cured Salmon Carpaccio with Petite Bok Choy Salad, Fennel & Mango Slaw, Ciabatta Toast

The bakery over at Bayview was a small establishment, a cafe that served only pastries and coffee. When I stopped by the downtown establishment last summer though, I realised that this establishment also boasted a restaurant. Thus, I was quite happy to find Senses listed as one of the participating restaurants of Summerlicious, allowing me to not only once more taste their luscious desserts, but also some of their savoury fares as well.

The menu again offered 3 starters, 3 entrees and 2 desserts to choose from. While the choices for the entrees were interesting and offered a variety of different protein, it would have been nice to see more of a range in their starters. They offered two fish selections, both prepared raw (spicy tuna tartare or citrus-cured salmon), while the 3rd choiced was a chilled cucumber & mint soup. For starters, I had the citrus-cured salmon carpaccio. The sweetness of the mango slaw balanced the saltiness of the salmon, while adding a nice crunch to the texture palate.

july19_09 copy
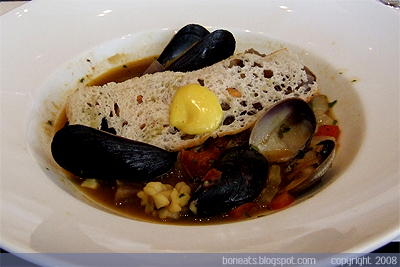
Bouillabaise with Steal-Head Salmon Fillet, P.E.I. Mussels, Purple Potatoes & Saffron Aioli

july19_10 copy
Moroccan Chicken Tangine with Preserved Kumquat, Couscous Salad, Harissa Broth & Orange Balsamic Glaze

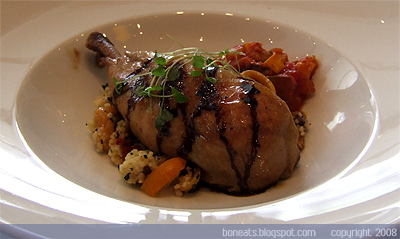
For the main course, I had the Moroccan chicken tangine, which smelled divine from all the spices. The harissa broth came in a separate little bowl that you can pour over the chicken yourself. The chicken was fall-off-the-bone tender and delicious drenched with the flavourful broth. The saltiness from the broth was balanced with the sweetness and slight bitterness of the kumquats. This was a really great, hearty dish; not too heavy in the summer, and would be fabulous throughout the winter as well.

july19_12comb copy
Top: Senses' Signature Banana Cream Pie
Bottom: Strawberry Shortcake

For dessert, I tried their signature banana cream pie. The crust of the pie was made from phyllo and filled with a banana-flavoured cream custard, topped off with slices of banana that were caramelized, leaving a golden-brown, crunchy finish.

All in all, it was a fun (and delicious!) dining experience at this year's Summerlicious. Both restaurants offered good-quality food, but if I really had to pick one to go back to, it would definitely have to be Canoe. I think the preparation of their food, the range of their menu, the friendly staff and the killer view all makes Canoe a winner. But if you ever find yourself close by the SoHo Metropolitan, I do suggest to stop by Senses for a cup of coffee and a plate of one of their delicious pastries, or better yet, take one home with you!

Name: Senses Restaurant & Bakery
Address: 328 Wellington St. W., ON (Ground floor of SoHo Metropolitan Hotel)
Cuisine: Continental, Fusion
Price Range: Entrees $30-45
Accessible: Yes

  © Blogger templates 'Neuronic' by Ourblogtemplates.com 2008

Back to TOP