Saturday, June 28, 2008

"Sweetness and Light"

"The pursuit of perfection, then, is the pursuit of sweetness and light." -- Matthew Arnold, Culture and Anarchy, 1882.
june29_01 copy

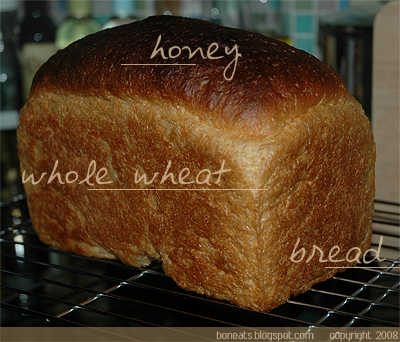
Ok, so when Samuel Johnson, and then Matthew Arnold talked about "sweetness and light," they probably weren't thinking along the lines of bread-making, but the concept of achieve a perfect loaf of a bread (or rather, an almost perfect loaf of bread) seems to be based on the same idea here. It was another bread-baking day today, and I decided to go the healthy route and make some whole-wheat loaves for a change. I usually prefer to eat whole-grain breads because of the greater health benefits it offers as opposed to white bread, but I've had difficulty in making wholte-wheat bread in the past, which was disheartening to say the least. My WW breads used to turn out dark and dense with an almost rancid-flavour to it, which I suspect has something to do with my whole-wheat flour itself. However, ever since I've been baking bread on a regular basis since last year, I've come to realise that I tend to get a much nicer WW bread or part-WW if it had a sponge or poolish to start off the bread. I still don't quite understand the chemistry behind it, nor will I pretend to, but something about the fermentation process helps mellow out the rancid flavour, and the liquid also helps to soften the wheat grains, which I think helps in yielding a softer, lighter bread.
june29_02 copy

So gone are the days of dense bread after I came across a recipe for Honey Whole Wheat Bread. I've had great success in the past with breads using dairy products, and was intrigued with this recipe since it used evaporated milk (although it did state that you can use other milk products, milk powder or even water if you're a vegan). I really do love the addition of milk products in my breads now, especially if it is going to be a sandwich loaf, because it really does add moisture to the bread and help lock in that delicious moistness for a few more days.

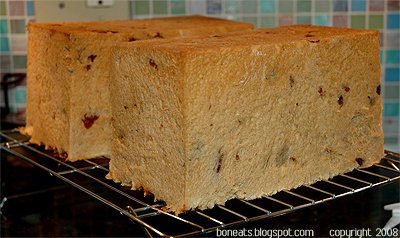
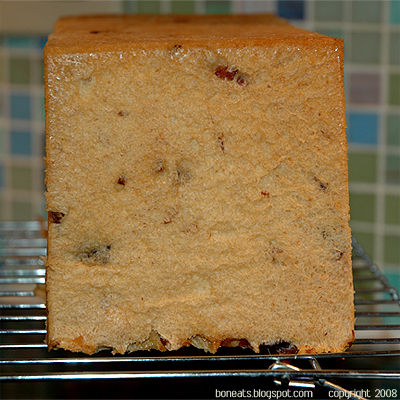
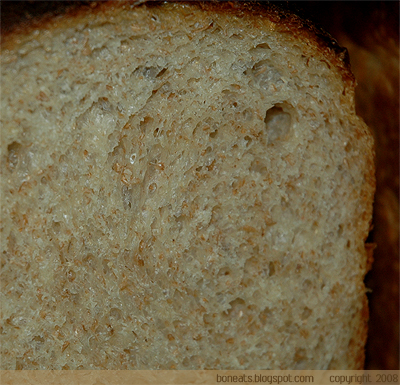
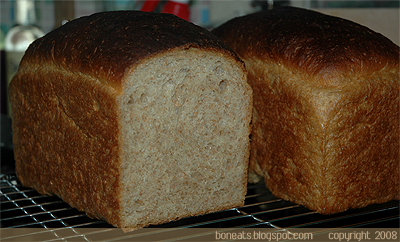
My loaves rose beautifully; I ended up baking them in my Pullman pans because the sides were higher, but I left the lids off. They smelled delicious while baking, and when I took them out of the pans, they were perfectly golden brown. The top does brown quite fast (depends on how hot your oven runs, really), so I did cover it with some foil halfway through the baking time. And I was delighted to find that the bread, when cut, had a very soft, moist and light(!!!) crumb, without the rancid flavour! The honey adds a nice subtle sweetness to the bread without overpowering it. This bread would make a delicious sandwich, and I can only imagine what a lovely morning I'll have tomorrow when I toast a slice of this up and drizzle some honey on top!
june29_03 copy

Honey Whole Wheat Bread
Adapted from this recipe
Makes two 9" x 5" loaves

1 lb whole wheat flour (about 3 1/2 cups)
12 oz hot water
8 ounces bread or all-purpose flour (about 1 1/2 cups)
1 5 oz can evaporated milk, warmed (105° to 115°F)
1/3 cup honey
2 teaspoons salt
3 teaspoons dry active yeast
3 1/2 teaspoons vital wheat gluten (optional)
Additional 1/2-1 cup flour, as necessary, to achieve the desired consistency

Mix the hot water and whole wheat flour together in a bowl. Cover the bowl with plastic and set aside until around room temperature, at least 1 hour.

In a separate bowl, pour 1 tablespoon of the honey into the warm milk and stir to combine. Sprinkle over the yeast and let sit for about 10 minutes. Add the yeast mixture to the whole wheat flour mixture, along with the rest of the honey, salt and vital wheat gluten. Mix for about 1 minute until well incorporated. Add bread flour, 1/2 cup at a time, untill the dough comes together and starts to come away from the sides.

Switch from the paddle to the dough hook, and machine-knead for about 15-18 minutes, adding additional flour as kneaded, until you have a tacky (but not completely sticky) dough. Alternatively, you can hand-knead at this point. Place the dough in a large, well-oiled bowl, cover with plastic wrap, and set aside to rise for 1 1/2 to 2 hours, or until doubled in size.

Divide the dough in two and shape the loaves. Place the loaves in greased 9 x 5 loaf pans, cover the pans loosely with plastic or tea towel, and set aside to rise again for 90 minutes.

Preheat the oven to 425°F. Place the loaves into the oven and immediately reduce the oven temperature to 375°. Bake for about 45 to 50 minutes, rotating the pans halfway so that they brown evenly, until the internal temperature of the loaves is around 190 degrees and the bottom of the loaf sounds hollow when tapped. If the top browns too quickly, cover with aluminum foil. Allow to rest on a wire rack for 15 minutes before removing from pans to let cool completely.


Monday, June 23, 2008

All Wrapped Up

june24_01 copy

Most nights, "dessert" usually consists of a platter of fresh fruits, making the most of the fruits of nature we're lucky enough to enjoy during the summer months before we plunged right back into the long, cold, dark abyss of winter. However, sometimes it's nice to have something a bit more special and out-of-the-ordinary, even on a weeknight. I love the mere fact that crepes can be thrown together, with a little bit of planning ahead of time, in mere moments, but still remains to be such a classic and elegant dessert.

June is such a fantastic month, not only because it's the official start of summer and the month of my birthday, but it's the time when so many fresh produce is starting to ripen and ready to be picked and eaten. As a kid, my parents used to go strawberry picking, and we would spend and hour or two one evening in the field, picking those lush, sweet berries off the bushes. Or more like my parents picking them while I just sat around eating them right off the bush... I haven't been back strawberry picking in over a decade now, and I've been nostalgic this year in wanting to go back to pick lots of strawberry in order to make my own jam. Unfortunately, the weather has not been co-operating with me, as it has rained almost every day this month.

Luckily I still had a box of strawberries lying in the fridge. While store-bought strawberries cannot be compared to fresh picked-from-the-field ones, they will have to do for now. With the leftover mascarpone I had from last week's Tiramisu, I quickly put together some Lemon Strawberry Mascarpone Crepes, a fresh and light dessert perfect for those hot summer days, and delicious with a drizzle of chocolate on top.

june24_02 copy

Lemon Strawberry Mascarpone Crepes
Adapted from Williams-Sonoma
Serves 4 to 6


1 egg
1 1/4 cups milk
1 tsp grated lemon zest
1 tsp vanilla extract
2/3 cup all-purpose flour
1/4 tsp salt
1 tbsp sugar (optional)
1/2 tsp canola oil
8 tsp melted unsalted butter or oil for brushing pan

For mascarpone filling
150 g mascarpone cheese
A couple drops of vanilla extract
1 tbsp granulated sugar
1 egg, separated

For strawberries
About 2 cups strawberries, sliced
Juice of 1/2 lemon, or to taste
Scant 1 tbsp sugar

Semi-sweet or dark chocolate, for drizzle
Confectioners' sugar, for dusting

For the crepes, combine milk, flour, egg, lemon zest, vanilla, salt, oil and sugar (if using) in a blender and process until smooth, about 30 seconds to 60 seconds. Cover and refrigerate for at least 2 hours, or overnight.

Meanwhile, place the sliced strawberries, lemon juice and sugar in a non-reactive bowl and mix until combined. Cover and refrigerate for at least 2 hours.

When ready to make crepes, remove the batter from the fridge and whisk the batter. Heat a crepe pan or small nonstick pan (about 6 1/2 to 7-inches in diameter) over medium-high heat. To test if it is hot enough, sprinkle a few drops of water onto the dry pan; if the water sizzles and instantly evaporates, the pan is hot enough. Reduce the heat to medium, and brush the pan with a heat-resistant brush with some of the melted butter or oil and pour about 1/3 cup of the batter into the centre of the pan, tilting the pan to spread the batter to the edges evenly. Return the pan to the heat and cook until the crepes is golden underneath, about 2m inutes. Using a spatula, flip the crepe over and brown the other side, about 1 minute more. Transfer the crepe to a plate, cover, and keep warm in a 200°F oven. Repeat with the remainder of the batter.

While crepes are cooking, make the mascarpone cream. In a small bowl, whisk the egg whites until stiff peaks form. Set aside. In a separate bowl, cream egg yolk with 1 tbsp sugar and vanilla extract. Add the mascarpone cheese and whisk until well combined. Add a large tablespoon of the egg whites into the mascarpone mixture, and with a spatula, gently fold into the mascarpone to loosen the cream. Scrape all the mascarpone mixture into the egg whites and gently fold to incorporate. Refrigerate until ready to use.

To assemble, lay a crepe flat, spread with 1 to 2 tablespoons of the mascarpone cream and 1 tablespoon of the sliced strawberries and fold the crepe into a triangle, a half-moon, or roll it up like a spring roll; repeat with the remaining crepes and filling. Drizzle with some melted semi-sweet or dark chocolate and dust with confectioners' sugar before serving.

N.A. Don't have mascarpone on hand? This cream taste much the same as Chantilly cream, so feel free to use whipped cream in place of the mascarpone to make Chantilly cream. Or serve the crepes and strawberries with a really good vanilla ice cream, a classic combination!

Saturday, June 21, 2008

Trading In My Glass For A Pint

june21_01 copy

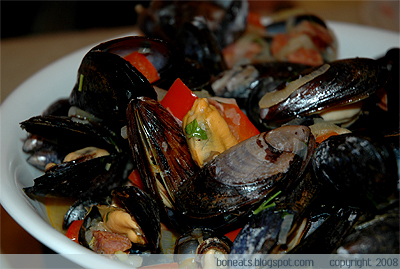
Mussels are plentiful at this time of the year, which is fantastic news for any seafood lover. Mussels are a wonderful shellfish, with its sweet, juicy flesh and delicate flavour (and must less pungent than oysters, if you're not as keen on seafood). It's also so simple to make, yet always makes a great impression at the dinner table.

I like my mussels to be simply made so as not to mask the natural sweetness of the meat, especially if you're buying fresh mussels. What a waste it would be to use fresh mussels and bake them with cheese or something...save that recipe for the frozen mussels during the off-season. But when you are lucky enough to get your hands on some beautiful fresh mussels, there's no better way to enjoy them than steamed. You retain the natural flavours in the mussels, and you also get to enjoy the delicious broth that comes with the mussels, infused with all the juices that dripped from the mussels as they slowly opened while steaming.

june21_02 copy

Perhaps the most popular way to prepared mussels is Moules Marinère, mussels steamed with white wine and herbs, often served in France and Belgium with a side of french fries. I love moules marinère because of it's simplicity and the delicateness of the broth, and it's a good way of using a white wine that I'll always have on hand in my pantry. However, I wanted to try a little something different this time, and since I still had a few bottles of Carlsberg lying around, I decided to steam the mussels with beer instead.

What I got in the end was a deliciously rich broth; the beer helps intensify the flavours and makes the broth a bit more robust without overpowering the delicate and natural sweetness of the mussels. The addition of the chorizo sausage also adds another layer of flavour to the palate, and really helps round out all the flavours. Absolutely delicious served with lots of crusty French bread to soap up all the delicious broth!

Beer-Steamed Mussels
Serves 3 to 4

2 lb mussels, bearded and scrubbed well
2 tbsp olive oil
1 large sweet onion, thinly sliced
2 cloves garlic, finely sliced
1 shallot, finely chopped
2 tsp Dijon mustard
1 small Chorizo sausage (or substitute a spicy sausage, like Italian or Andouille), chopped
1 red pepper, diced
½ cup celery, sliced ¼-inch thick
1 340-mL bottle beer, preferably light (like an ale)
Juice of ½ lemon, or to taste
Handful fresh Italian parsley, chopped
Salt and freshly ground black pepper, to taste

In a large pot or a Dutch oven over medium-high heat, add olive oil and/or butter. Add celery, onion and garlic and sauté until softened, about 3 minutes. Add chorizo and red pepper and cook for another 5 minutes until chorizo is golden brown.

Add the beer, lemon juice, mustard and the mussels. Cover and steam until mussels open, about 7 to 8 minutes. Stir in chopped parsley. Adjust seasoning. Serve immediately with crusty bread to mop up the delicious broth!

Wednesday, June 18, 2008

Summer Grillin', Korean Style

june18_01 copy

I have a confession to make: I actually enjoy going grocery shopping. That can't be said for many people, who find the weekly chore tedious, and despite the necessity to stock up on kitchen staples, begrudgingly make the trip to the grocery store and back in as little time as possible. However, I love going to the grocery store, my list in hand, and if I have a bit more time that day to spare, to spend a few extra minutes browsing the aisles to see what new products they have in stock, or come across a special sale.

Therefore, I was excited when my mom came across a Korean supermarket and suggested we visit it during our trip to Toronto last week. I was absolutely in for it. I think a great way to learn about different cultures is through their cuisine, so my mom and I have always been fascinated by supermarkets and grocers of all kinds: Italian, Middle Eastern, Japanese, Korean...the list goes on. Every time I go to a new cultural supermarket, I feel like a kid again on a field trip: there's always something new to see and learn.

june18_02 copy

The Galleria Supermarket is similar to the Chinese supermarket we frequent when in the GTA area, T&T, with the obvious fact that everything here is Korean. The supermarket boasts a food court which serves traditional Korean, Korean-Chinese, and Japanese dishes. It also has a wide variety of already prepared hot meals and snacks, and makes tofu on-site. The meat and seafood selection also boasts a large variety and is extremely fresh, while you can head over to the banchan station to try almost two dozen different sidedishes.

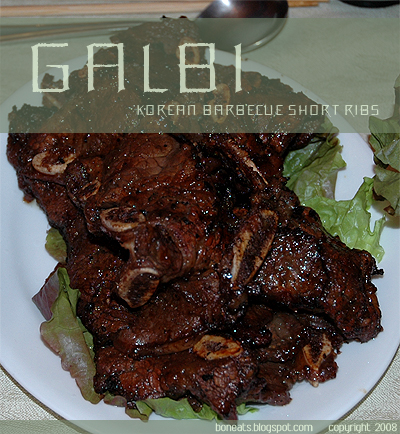
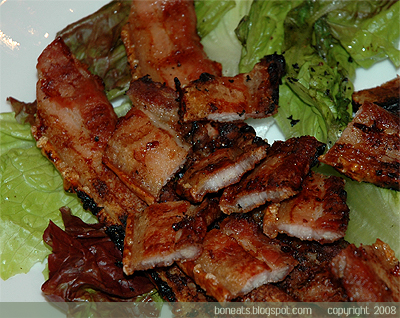
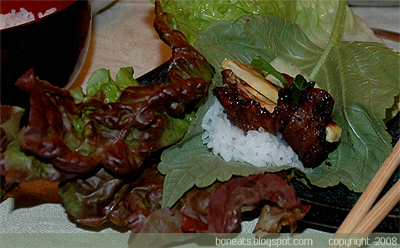
Naturally, we ended up picking up a bunch of things up while at the Galleria as I started to plan for a Korean barbecue dinner for later in the week when we returned home. I ended up making two classic Korean barbecue dishes: Galbi (갈비), grilled beef short ribs, and Samgyeopsal (삼겹살), grilled pork belly (pictured above).

june18_04 copy

I was lucky enough to have the chance to experience a true Korean barbecue meal two years ago during my trip to Seoul, and it was unlike any Korean barbecue meal you'll ever experience in a North American restaurant. Firstly, North American Korean grill houses are always, always heavy on meat, a reflection on the more carnivorous diet of North Americans. Meat is quite expensive in Korea, and is consumed in small portions. What I found the most interesting too is that they'll often wrap a piece of grilled meat in a lettuce leaf with some rice, garlic, ssamjang, alson with some grilled kimchi or other grilled vegetables. Not only does this help cut through the greasiness of the meat, but you also end up eating a lot less meat overall, and you get a balance of both your proteins and your greens.

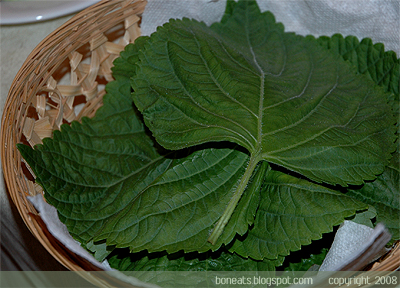
I've come to love the way Koreans eat their grilled meat, and always wrap my meat in lettuce whenever I get the chance. With the discovery of the Korean supermarket, I was finally able to get my hands on some perilla leaves (pictured above) to try out, which is also a very common leaf used to wrap meat with. Perilla leaves has a really distinct flavour, reminiscent to basil and mint and thus, adds a really interesting flavour to the grilled meat. I love wrapping a piece of meat with some white rice, grilled sweet potato (the purple skinned, yellow flesh variety), grilled mushrooms (we grilled King Oyster mushrooms this time), some grilled green onions and sliced garlic cloves, a dab of homemade ssamjang and a slice of cucumber, a refreshing touch, in a piece of lettuce and perilla leaf (pictured below). Koreans often eat these lettuce wraps in one bite, so good luck trying to stuff the package into your mouth!

june18_03 copy

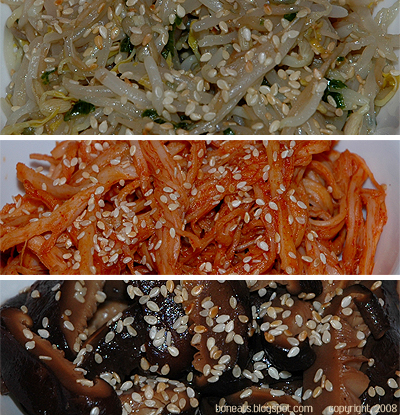
Besides buying some banchan (sidedishes) at the supermarket, including Ggakdugi (radish kimchi), Miyeok Joolgi (seasoned seaweed), Myolchi Bokeum (seasoned dried anchovies) and the staple on every Korean table, Kimchi, I also made some Pyogo Bohsot (stir-fried shiitake mushrooms), Sukju Namul Muchim (seasoned mung bean sprouts), and Ojingeochae Bokkeum (stir-fried dried squid strips) to accompany the grilled meat, rice and lettuce wraps.

june18_09comb copy

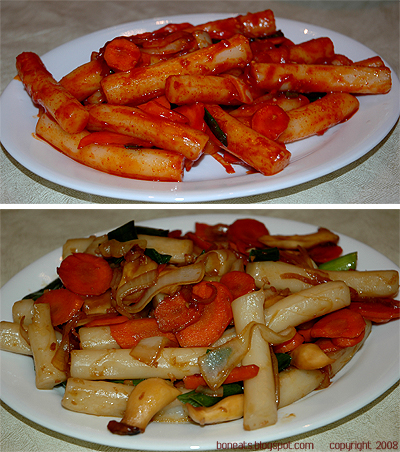
I also picked up some fresh rice cakes at the supermarket and stir-fried them a few nights ago in two different ways: one in a sweet & spicy sauce, and the other in a savoury sauce. The sweet & spicy sauce, known as Ddeokbokki (떡볶이) is the more commonly eaten dish in Korea, and can be found all over the streets of Seoul at street vendors. While in Seoul, I often saw groups of people standing around these carts and vendors, a toothpick or wooden chopsticks in hand with a bowl of this bright red concoction, poking away at these soft and chewy rice cakes. The other version I made is made with soy sauce, and is also quite delicious. That version is known as Gungjung Ddeokbokki, which translates into something like "Royal Rice Cake"

june18_06comb copy

It's definitely been a culinary adventure these past few days, as I've been absorbed in learning more about Korean cuisine, and enjoy their food. It's a fun (and delicious!) way to learn about a different culture, and I strongly urge you to do the same when you some free time on your hands. Check out a cultural grocer and supermarket, and have fun with the new and unfamiliar ingredients you'll come home with next time!

Galbi (Grilled Beef Short Ribs)
Adapted from TriFood.com
Serves 4, or 2 very generous portions

8-10 beef short ribs, cut LA style
1/2 cup soy sauce
1/3 cup + 1 tbsp brown sugar
1/4 cup water
1/2 Asian pear or 1/4 Korean pear, chopped **
1/2 medium onion, chopped
1 tbsp minced garlic
2 tbsp ground black pepper
1 1/2 tsp juice of ginger (or finely grated, using a fine microplane grater)

Rinse meat under cold water. Dry wet paper towel and set aside.

In a food processor, add the chopped onion and pear and puree finely. Pour mixture out into a large, nonreactive bowl and add the remaining ingredients; stir.

Add the ribs into the bowl, and mix to combine. Cover with plastic wrap and marinate the ribs for 8-10 hours or overnight in the refrigerator. Alternatively, place the ribs into a large ziplock bag and pour the marinade over the ribs. Seal the bag, massage the ribs a little and place the bag into the fridge.

Traditionally, galbi is grilled with wood charcoal, but you can certainly grill it on a gas stove, indoor electric grill or an outdoor grill. They cook fairly fast, about 2-3 minutes on one side.

Serve with lettuce, perilla leaves (if available), spring onions, sliced garlic cloves, cucumbers sliced lengthwise, ssamjang, and white rice, if desired.

**N.A. If you can't find either Asian pear or Korean pear, you can substitute 1/2 a kiwi for the pear. The pear juice actually acts as a meat tenderizer, but the kiwi fruit does the same trick. Using pear juice or kiwi juice will ensure that you'll have beautifully tender short ribs after being grilled, rather than trying to chew on stringy and tough beef.

Tuesday, June 17, 2008

Perfect From All Sides

It was another bread-baking evening last night, and I whipped up two beautiful Raisin Loaves using my new pullman pans that were brought back for me all the way from Hong Kong last month. I've been excited all month about these pans. Not only did they produce perfectly square loaves, giving a lovely, evenly golden crust on all four sides, but loaves such as this raisin bread, and even my milk loaf, now exactly resemble the same kind of breads I used to love and always buy at Chinese or Japanese bakeries.

june17_02 copy

Square loaves are quite common to find in such East-Asian bakeries, while we often find the pillow loaves more common here in North America. I've already used my new pans a good number of times this past month, and I'm extremely satisfied with them. What I've noticed with these square loaves (along with my dad) is that for some reason, the bread keeps its moisture for longer. Perhaps because all the sides bake evenly when its contained in the box, thus allowing for less moisture to escape from the top, unlike the topless loaf pans.

june17_01 copy

I'm happy to say that I can now enjoy a true Hong Kong-style breakfast: a thick slice of bread toasted, spread with some butter and jam, peanut butter and honey, or a classic HK spread, condensed milk (if you've never tried it on toast, you are seriously missing something quite brilliant!) along with a delicious cup of HK-style milk tea. That is to say, if my loaves of bread can last that long; not even an hour after they came out of the oven, my dad already ravaged half a loaf...

  © Blogger templates 'Neuronic' by Ourblogtemplates.com 2008

Back to TOP